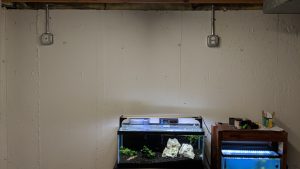
Since my fish room is in an unfinished section of my basement there weren't any outlets along the wall where most of my tanks will be going. In fact, the only available outlets in the room were on the same circuit as my washing machine, which pulls about 10 amps by itself. I estimated that the number of aquariums I plan to eventually run in this room would eat up 7 or 8 amps, potentially more if I include one or two high-light planted tanks.
I'm taking my time with each upgrade to the fish room to make sure that I build in the ability to expand by adding more tanks if I want to later. (See my fish room sink plumbing as an example) I thought about running an extension cord from a nearby circuit, but ultimately I decided to have a dedicated, 15 amp GFCI circuit installed by an electrician. Although I'm doing all of the plumbing and building the racks myself, I don't like to mess around with electricity, especially at the service panel.
Fish Room Under Construction - Dedicated Circuit Installed
I had the receptacles mounted a little over 6 feet up the wall so that they would be above the tops of the tanks. With a 15 amp circuit just for my aquariums I'll have plenty of power for the 10+ tanks I plan to eventually run. I'll also have power for additional devices like a sprinkler timer and dehumidifier. Once I start setting up racks this wall will be a lot more full, and I'll be able to mount power strips to each rack without running extension cords along the floor or around the room.
I recently bought a house that has a good space to dedicate to building a fish room, and I'll be posting about my progress getting it set up. I'm doing everything myself - except some electrical work, more on that in a later update - and I'll break it down into steps someone else wanting to setup a fish room might actually be able to follow.
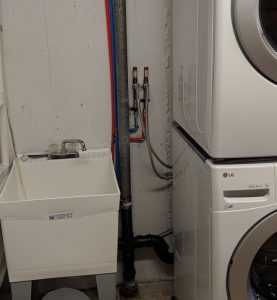
Old Plumbing (new sink shown)
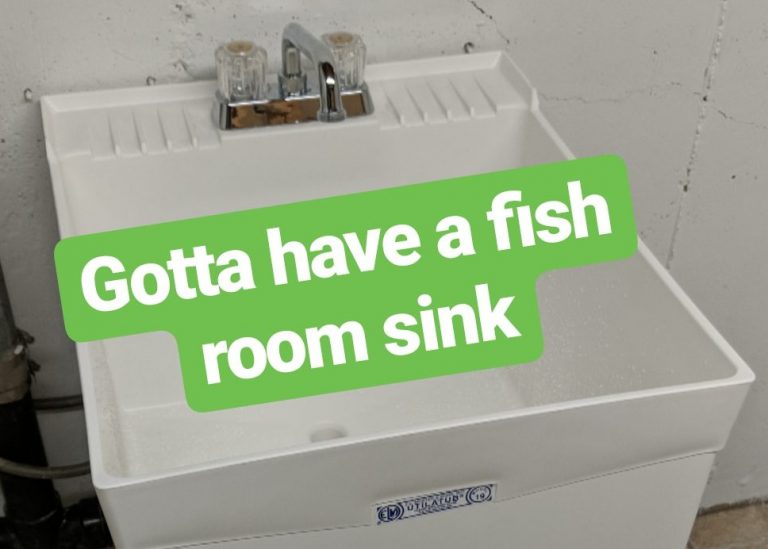
My fish room is in the only unfinished room in the house, which is also the laundry room. The space is ideal because it has a floor drain and a sink, but I had to re-arrange it to give myself more space for aquariums. The previous owners did not have stacking laundry machines, so the room was plumbed in a way that put the washing machine and the dryer on opposite sides of the sink. I wanted to put in stacking units, and because of the room's layout I needed to stack them where the existing sink was.
I decided I needed to replace the sink and move it, flip the drain lines for the sink and the washer, and re-route the hot and cold water lines using PEX tubing.
New Drain Assembly
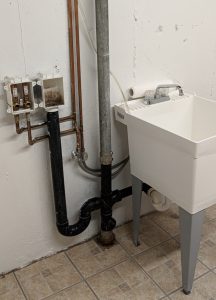
Luckily the existing ABS drain assembly was held in place by shielded couplings that I was able to remove easily. I built a mirror image copy of the existing drain assembly and installed it between the existing sections of cast iron pipe coming from the ceiling and up from the floor with new couplings. I cut the ABS with a hacksaw and cemented it together, which was a lot easier than I expected. The challenge was getting the vertical section to the exact length that would fit between the iron pipe coming from upstairs and the section of pipe going down into the floor.
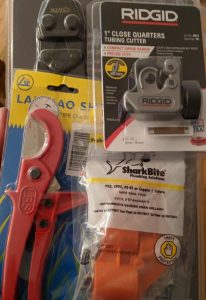
PEX Tools
Once I had the drains switched I started cutting out the existing copper supply pipes at the ceiling. I used a handheld pipe cutter that rotates around the pipe which cut through them like butter. Then I used half inch shark bite fittings to join my red and blue PEX to the existing copper lines. I had to buy a PEX cutter and clamp tool, both of which were easy to use and made installing the new lines go really fast. Links for all of the tools I used here are listed at the bottom of the post.
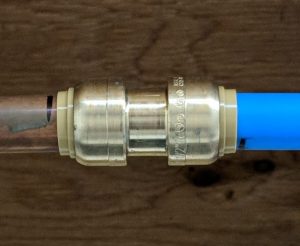
1/2" Sharkbite fitting - copper to PEX
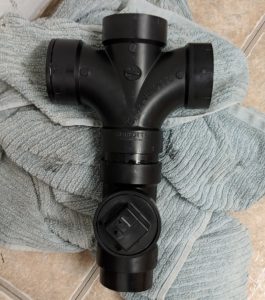
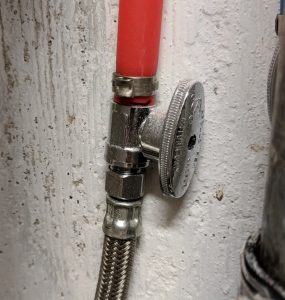
For the sink connections I used some threaded/PEX barb valve fittings at the end of the PEX line so I could screw the faucet hoses onto the threaded fitting.
Sink hot water connection
For the washing machine I wanted to keep the existing water hammer arrestors, so I just cut them off the old copper pipe and used 2 more sharkbite fittings to join them to my PEX line. The sharkbite fittings haven't leaked at all and they were the easiest thing to install. You just need a deburring tool (see tool links below) to make sure there are no sharp edges on the PEX or copper that would damage the internal O-ring that keeps the sharkbite sealed.
New Standpipe Installed
The faucet I installed on the utility sink has a threaded nozzle so that I can attach a hose or python for doing water changes. Eventually I will probably be installing an automatic top-off water line that operates on a timer to keep all of my aquariums full and allows me to do automatic water changes. But that project is a few months out. The nice thing about the PEX tubing is it will be easy to splice in a couple of tees and run that new line.
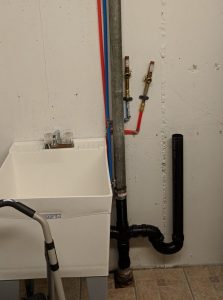
New Plumbing Finished
The last challenge I had was securing the PEX lines to the concrete wall. I had to buy a hammer drill to make pilot holes for concrete anchors. I got a cheap refurbished model that worked fine for the few holes I needed to drill. In the final photo you can see the PEX is nice and clean and I haven't had any leaks after a couple weeks of regular use.
I'm currently working on another phase of the fish room setup: installing a water filtration system that will serve the fish room and the rest of the house.
Having adequate filtration is a key component to keeping your water clean, both aesthetically and for the health of your fish. You don’t have to spend a lot of money to get a lot more performance out of your existing filters. Using some of these DIY aquarium filter hacks, I’ve been able to keep very high stocking levels in my planted tanks, which allows me to grow out more fish. I've had 50+ guppies growing out happily in a well-filtered 20 gallon aquarium. Using cheap materials you can double or triple the filtering capacity of any filter (although I’ll focus primarily on hang on back (HOB) filters here).
First, a very quick summary of the 3 types of filtration.
Mechanical filtration is when a material catches debris as water passes through it.
Biological filtration is the process of bacteria that have colonized the filter media converting toxic ammonia from fish waste into less toxic nitrites, and then into nitrates. Nitrifying bacteria can only live on surfaces in an aquarium, so the best biological media has a very high surface area. This is the key to supporting high bio-loads.
Chemical filtration is the process of using a chemical to absorb or neutralize toxic ammonia, heavy metals, or medications in the aquarium. Activated charcoal is the most common example. I don’t use chemical filtration in any of my tanks unless I am trying to remove a medication or other contaminant, so that will not be a part of this discussion.
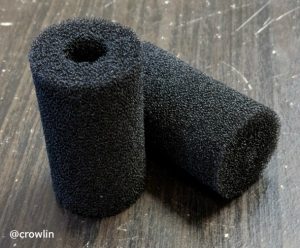
Hack # 1: Intake Sponges
intake sponges
Intake sponges can be purchased in large packs online, and are sometimes even carried in the mega-mart pet stores. These are the easiest way to get more filtering capacity out of any filter. I have an intake sponge on every single filter in my fish room. Buying in bulk each sponge cost me under $3. They slide over the end of the intake stem so that water must pass through the sponge before entering the filter. This provides several benefits.
First, the sponge acts as a mechanical barrier that traps larger debris before it enters the filter. Sponges can be easily cleaned by squeezing them out in a container of old water from the aquarium. This keeps fish waste, excess food, and plant debris from entering your filter and potentially clogging up the impeller or gathering in the bottom.
Second, the intake sponge provides biological filtration due to its high surface area and the constant flow of water moving through it. Most of the commonly sold HOB filters come with a single thin sponge to act as the biological stage. Adding an intake sponge can instantly double your biological filtering capacity!
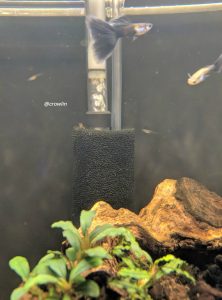
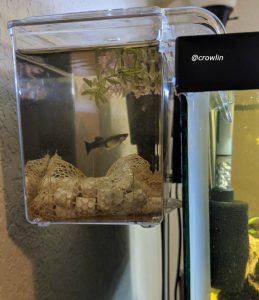
Third, if you’re a shrimp keeper like me, or you breed and raise young fish, the intake sponge is an absolute necessity. Shrimp can graze on the biofilm and debris that gets caught by the sponge, and even very small fry won’t be sucked up into the filter to meet their demise. The photo below shows the intake on a breeder box used in my guppy rearing tank, which also houses a thriving colony of neocaridina shrimp.
Sponge on breeder box intake
Hack # 2: Water Polishing Filter Floss
For several years I routinely purchased OEM filter pad replacements, not realizing there was a cheaper, superior, more customizable solution available.
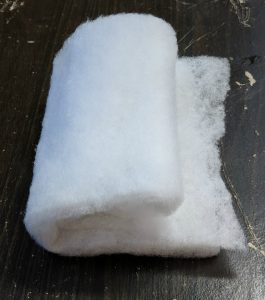
What is this water polishing panacea? Polyester quilt batting - AKA filter floss. This stuff is available all over. Google it. You can buy a huge roll for roughly $20 that will last a long, long time. Cut into strips 6” wide by 24” long, a 72” x 90” roll will give you 45 filter floss refills at a cost of under 50 cents each.
I take quilt batting and cut it into strips about 6” wide and 2 feet long, then wrap it around the filter pad frame that came with my HOB filter. This stuff catches almost all of the tiny particles that the intake sponge didn’t capture. The result is crystal clear water. I change it out every 2 weeks, or when it’s brown and gunked up.
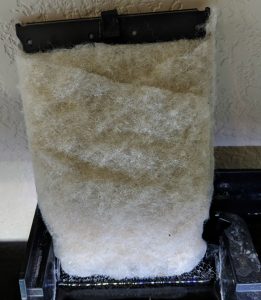
Quilt Batting (new)Quilt Batting - as installed (used)
You can also take Poly-fil - which is the same material as polyester quilt batting, just loose fibers instead of a roll - and stuff it into a sump or canister filter. Just use it to replace whatever disposable filter pads you are currently buying, or to supplement your existing media. The important thing to keep in mind with either quilt batting or the loose poly material is that it has to be 100% polyester and not treated with any chemicals in order to safely be used in a filter.
Hack # 3: More Media
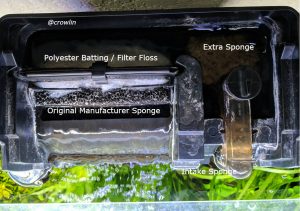
So by now you’re seeing that the more media (or surface area) you can get into your filter, the more beneficial bacteria it can support, and the more filtering capacity you’re going to have. A great practice is to cram an extra sponge, a bag of bio-rings, or bio balls into one of your cycled filters if you have unused space. I keep an extra sponge in one of my HOBs, so that I have a cycled sponge on hand if I want to set up another tank (which is inevitable). In the photo below, you can see I have an extra aquaclear sponge stuffed into the empty space on the right side of one of my HOB filters. This space would otherwise be left empty. Instead I’ve increased my filter’s biological capacity.
HOB Filter with quilt batting and extra sponge
Walking through a pet store looking at the price tags on filter “refills” can be discouraging, but it’s important to note that biological media such as sponges and ceramic rings almost never need to be replaced. Many manufacturers have literature that tells you to discard your bio media after 2-3 months and replace it. This is purely a scheme to increase sales. Ceramic rings and sponges do not go bad, all you have to do is rinse them out in aquarium water to clean them. The only media that needs to be replaced regularly is filter floss and chemical media such as charcoal. In the filter I showed above, the only thing I replace is the polyester batting at a cost of roughly $1 a month. The sponges have been in use for over a year and will last several more.
Hack # 4: Breeder Box Filter
You can take an air driven breeder box and turn it into a customized HOB filter that also acts a quarantine / breeder box. By attaching a sponge to the intake of a breeder box, you’ve already created a sponge filter. You can take this even further by filling the breeder box all the way up with whatever media you want. The great thing about breeder boxes is they increase your total water volume and can hold plants, gravel, bio media, and fish. In my case I use the intake sponge and a bag of biomax rings plus some live plants in the box to add biological filtration while using it for breeding or quarantine.
If you have a large breeder box with vertical dividers, you can create a two or three stage HOB filter that is customized to your needs. You could even use one side as a quarantine and fill the other up with media.
Breeder Box with bio rings
Keep in mind that while all of these hacks will improve your filter’s ability to turn ammonia into nitrate, all those nitrates aren’t going anywhere unless you:
A) Perform regular water changes, or
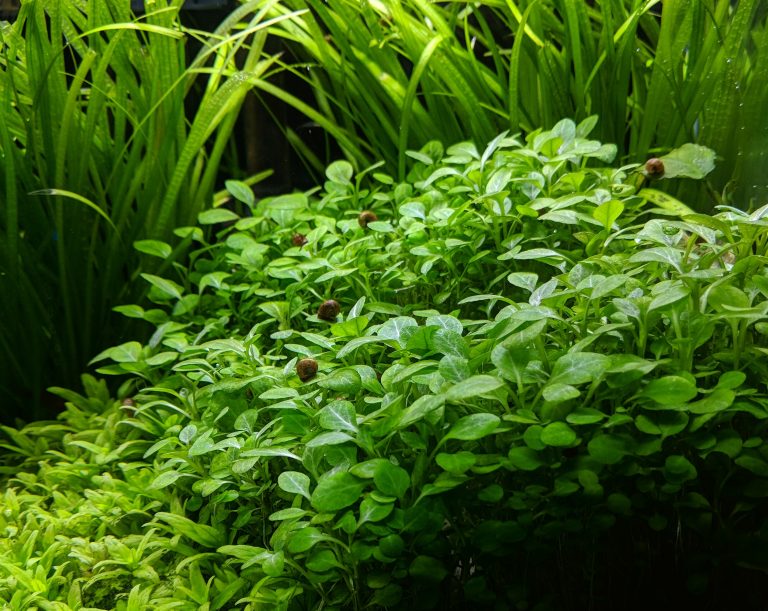
B) Keep plenty of live plants to soak up those nitrates.
Links to purchase items referenced in this post on Amazon: