Skip to content

Betta Barracks at About Fish Inc. in Westminster, CO

Do bettas need a filter?

Yes.

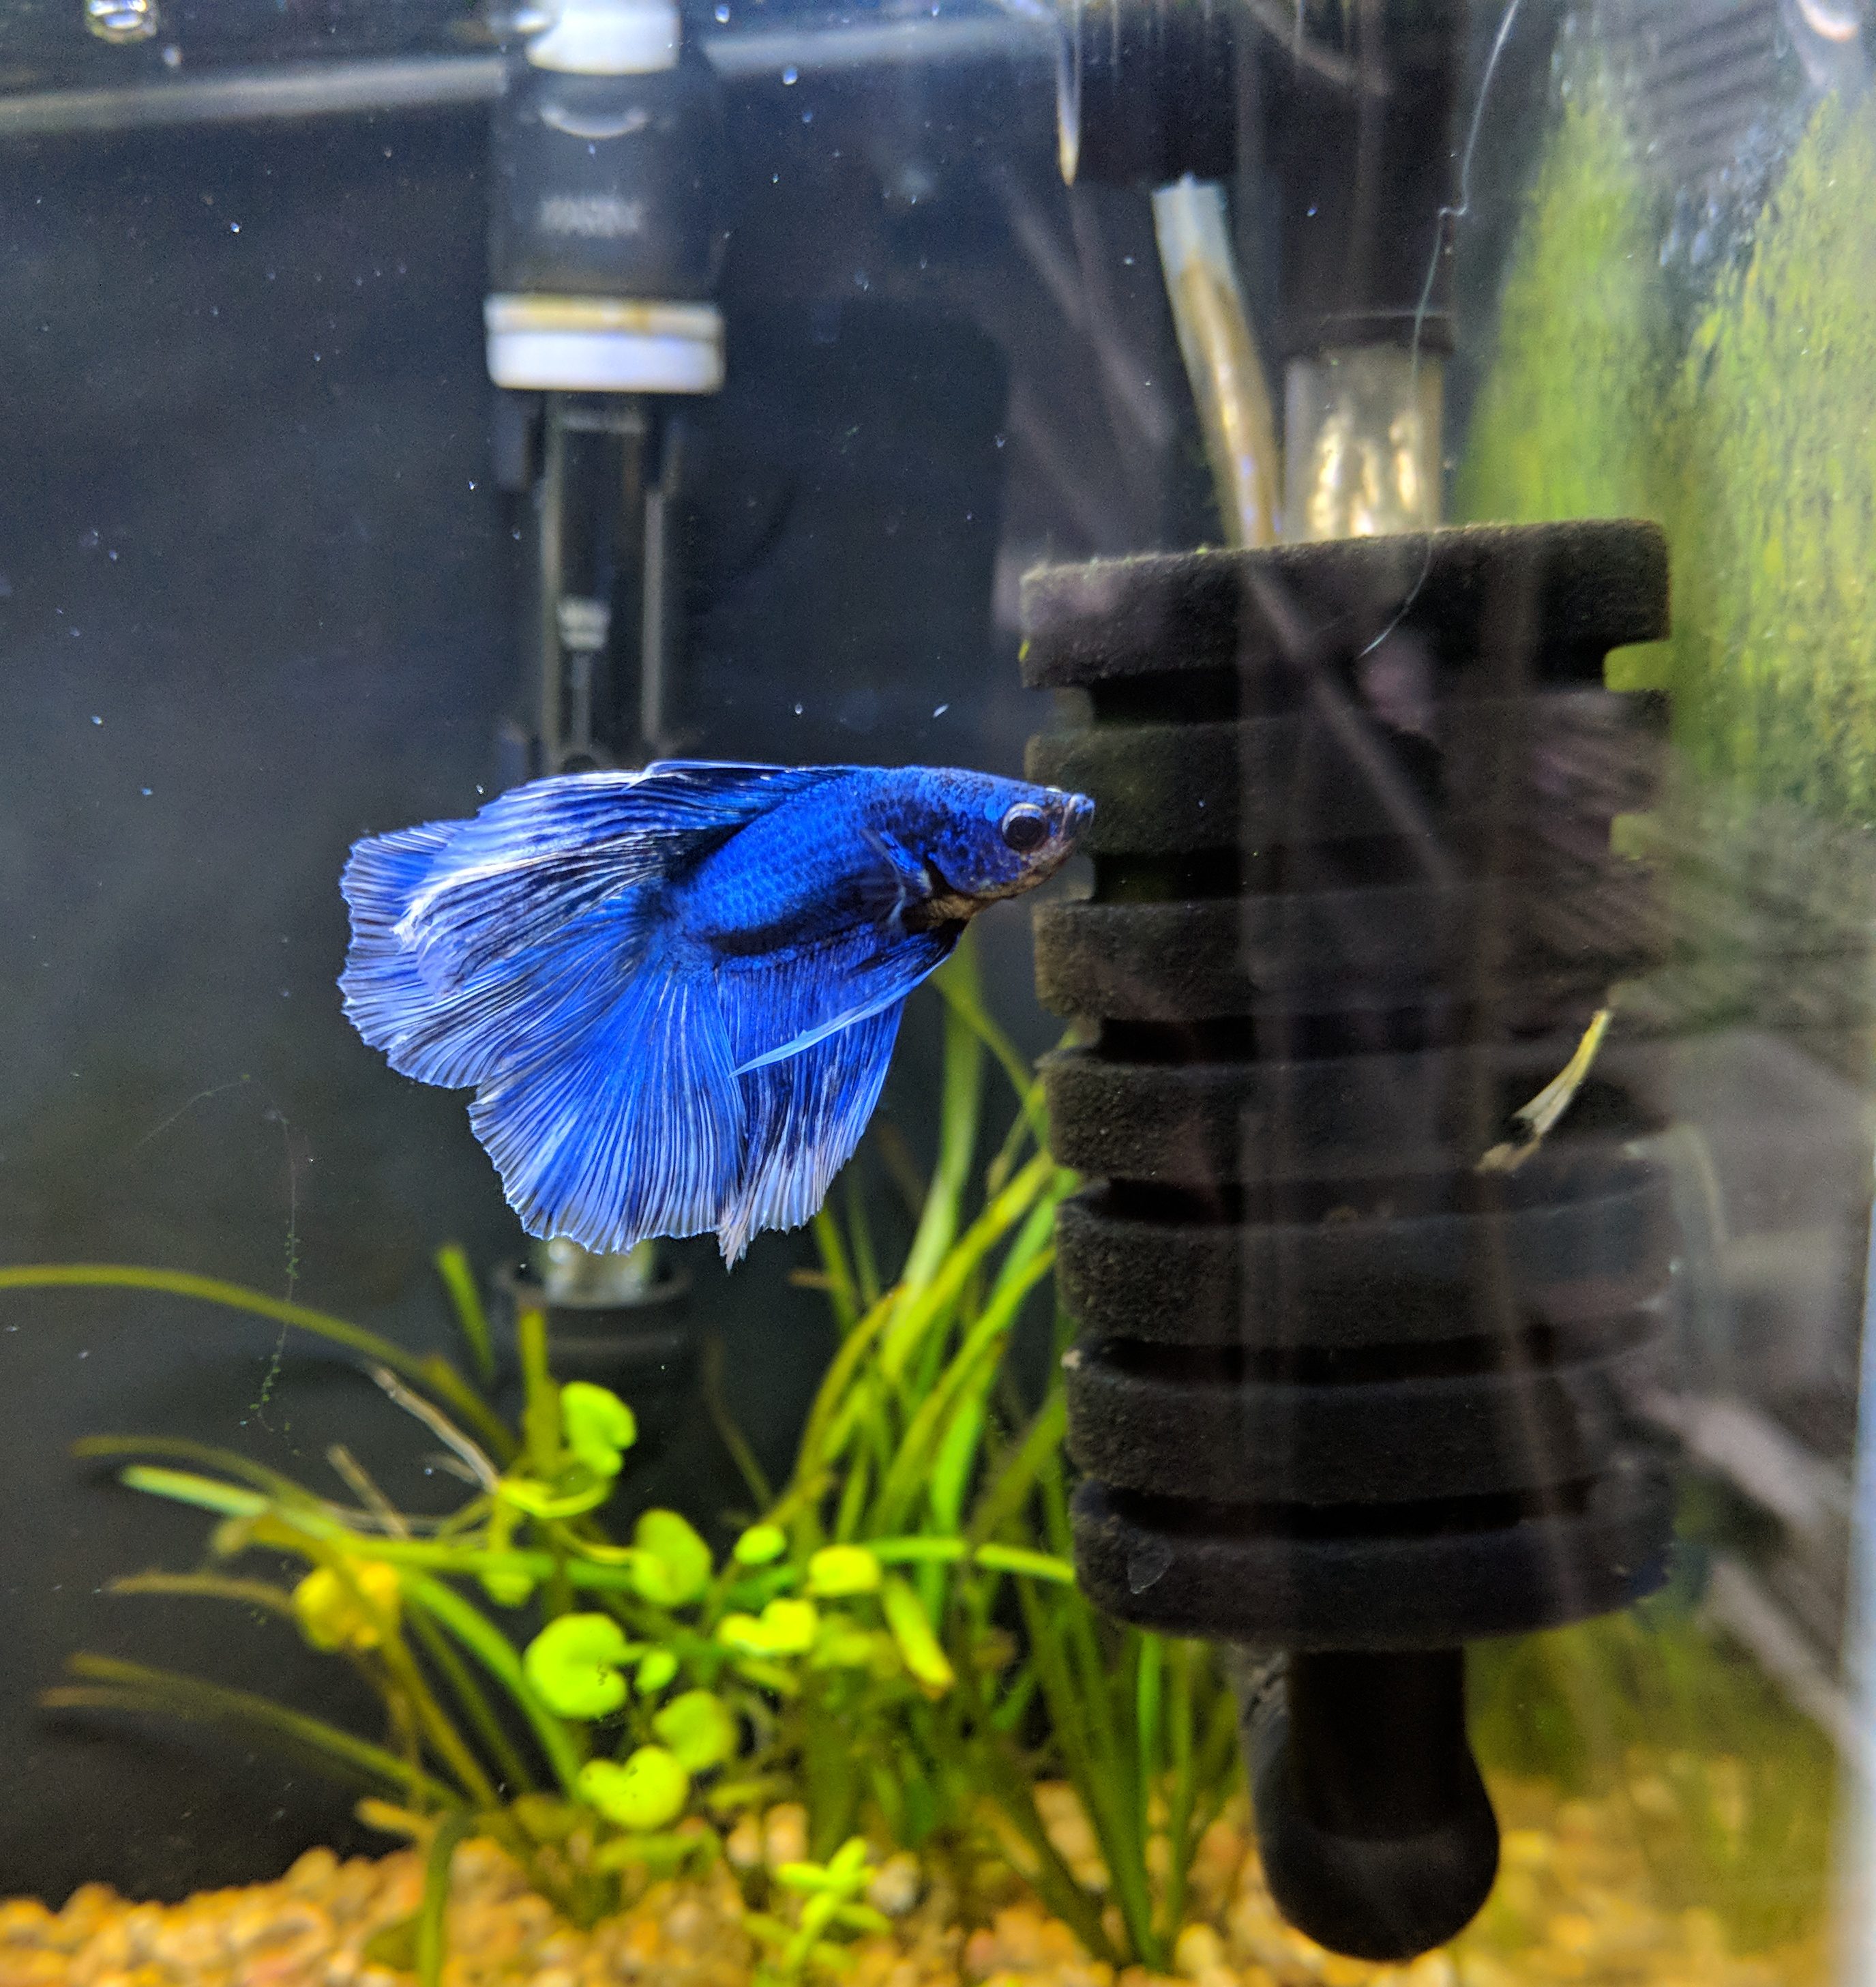
Although bettas are often seen in unfiltered bowls, they need filtration to survive longer than a few weeks. See this post on the nitrogen cycle for more info on why all fish need filtration. A big or expensive filter is not necessary. A small sponge filter like this one is sufficient for a single betta.

Betta posing with a heater and a sponge filter

Do bettas need a heater?

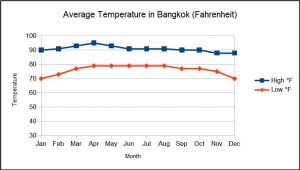
Yes, unless they are kept in a room that never drops below 74 °F. Betta Splendens are native to the Chao Phraya River in Thailand. Temperatures there are consistently warm all year, ranging from 75-90 °F. If you live in a tropical climate, you may not need a heater. Betta species prefer a water temperature of around 75–82 °F.

Bangkok Average Temperature

A small heater like this one will only run you about $10-$20 and will keep your betta a lot healthier than consistently cold water. Always use a thermometer so you can keep an eye on the temperature.

Can a betta live in a bowl?

Yes, if it holds at least 2 gallons of water. Not sure how much water your bowl will hold? Use a milk jug or soda bottle to measure the amount of liquid you can add. Two gallons is equivalent to about 7.5 liters. Anything smaller than this will require frequent maintenance to remove waste so that the water is not foul, and will be too small to add a filter.

Even better than a bowl, though, is a nano tank like the Fluval Spec. These small aquariums come as a kit with a filter and a light, and make a perfect home for a single male Betta Splendens.

So why do stores sell Bettas in cups?

Because money.

Bettas are a member of the gourami family, which means they are aggressive. This is why another name for the Betta Splendens is the Siamese Fighting Fish. Male bettas cannot be housed together, and they don't do well with most other species of fish. This makes housing bettas in a store properly not very cost effective. It is cheaper for a large percentage of them to die than to provide each one with adequate space in a heated and filtered system.

The other reason that bettas are so often sold in cups is that they have a special labryinth organ that allows them to take gulps of air from the surface. This is a common characteristic of anabantoids, a group which includes gouramies. Because of this organ, bettas last longer in low oxygen environments than other fish. The problem, however, is that ammonia from fish waste can still burn their gills and kill them. In a tiny, unfiltered container, ammonia levels can quickly become deadly.

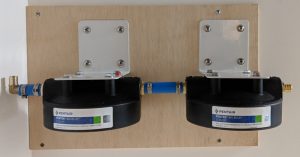
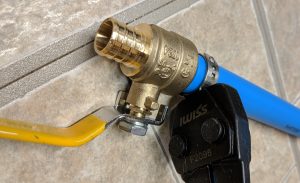
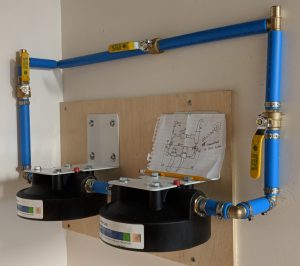
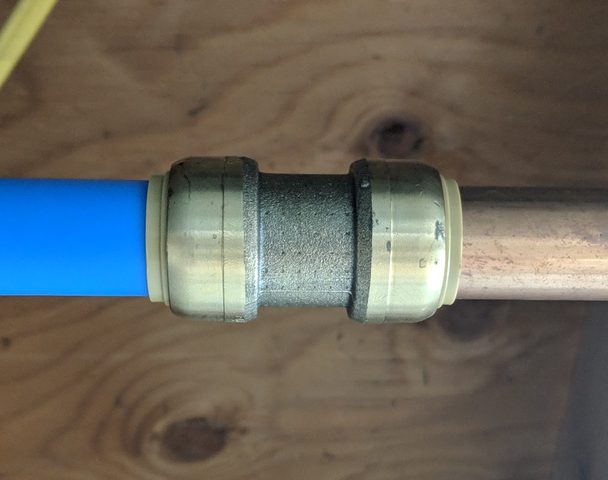
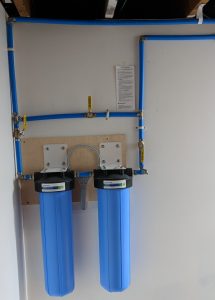
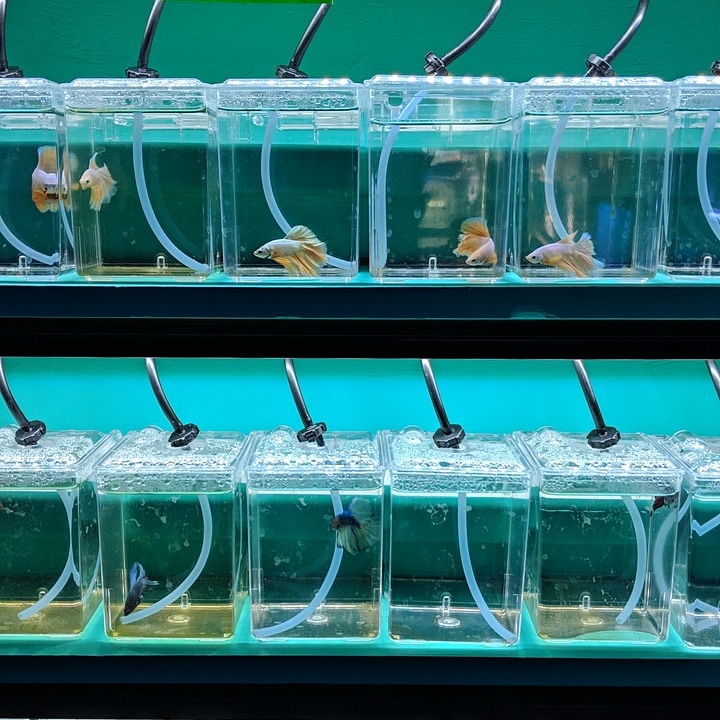
The solution to this, which all pet stores should implement, is a betta barracks. This is a rack system that houses each individual male betta in a small container, but each container is plumbed together. The water is heated and filtered as it moves through this rack system. This video by Aquarium Co-Op explains how to build a DIY betta barracks. Unfortunately, this system costs money to implement. But it is far more humane than keeping fish for sale in small plastic cups.

Healthy betta in a planted 10 gallon aquarium

What can you do to change the way bettas are treated?

Don't buy a betta - or ideally, any fish - from big chain stores that keep them in cups. I have been to several local fish stores that had bettas in barracks racking systems. These local stores will typically have a better selection of healthy fish. The big box chains see bettas as a gateway product that allows them to sell you a bowl, chemicals, food, gravel, and decorations. As long as people are buying bettas in cups, and cheap tiny plastic bowls, they will keep selling them.

4

The Nitrogen Cycle

The Nitrogen Cycle
The Nitrogen Cycle

You may have heard people talking about “cycling” a fish tank. What they are referring to is establishing the nitrogen cycle. This is a common issue that new fishkeepers run into when setting up an aquarium. Basically, you need to establish a healthy colony of bacteria that will take harmful fish waste (ammonia) and convert it into a much less harmful substance (nitrate). However cycling a tank is only the first step. This post will delve into why regular water changes are critical to maintaining a healthy aquarium.

Ammonia (NH3)

Ammonia is highly toxic to fish and other animals. It is a nitrogen waste product of protein catabolism. It is produced by fish waste, and also by decaying food and organic material in the aquarium. The ideal level for ammonia in an aquarium is 0 ppm (parts part million) or 0 mg/l. Sustained levels of ammonia even in the single digits can cause ammonia toxicity and death in fish.

The exact lethal level for ammonia in an aquarium is actually dependent on the pH of the aquarium. NH3 (ammonia) converts to NH4- (ammonium) and vice versa based on both pH and salinity. This means ammonia does become less toxic at a lower pH. However, this should not be taken to mean that lowering the pH is an appropriate way to deal with elevated ammonia. Changing the pH of an aquarium can have other harmful effects on fish, and is not a sustainable way to deal with ammonia.

Nitrite (NO2-)

Nitrosomonas is a genus of bacteria. This organism oxidizes ammonia into nitrite as a metabolic process. This means the bacteria consumes ammonia and leaves behind nitrite in the aquarium. Unfortunately, nitrite is almost as toxic to fish as ammonia. The ideal level of nitrite in an aquarium is 0 ppm or 0 mg/l. More info on nitrite can be found in this article by Practical Fishkeeping.

It takes about 4 weeks for a sufficient colony of nitrifying bacteria to develop in a new aquarium. This process can be helped along through the addition of a bottled bacteria supplement, such as Seachem Stability. I recommend using Stability to establish healthy bacteria on all new aquariums.

Nitrate (NO3-)

Bacteria called Nitrobacter consume nitrite and convert it into nitrate. This is the final stage of the nitrogen cycle in the aquarium. Once waste has been converted into nitrate, it remains in that form and continues to accumulate in the aquarium. Nitrate is far less toxic than ammonia or nitrite, but it does become toxic to fish when it rises above 100 ppm or 100 mg/l. Ideally, nitrate should be kept below 20 ppm at all times. Sustained exposure to nitrate levels over 20 ppm has been shown to stress fish, making them susceptible to diseases and less likely to breed.

Removing Nitrate Through Water Changes

So how can you prevent nitrate from building up to a toxic level in your aquarium? The answer is regular water changes. When you remove 25% of the volume of water, you also remove 25% of the total nitrate. Replacing the old water with fresh water dilutes the remaining nitrate to a safer level for your fish.

Say for example you have a 20 gallon aquarium with some guppies and snails living in it. You feed the fish daily, adding a few ppm of nitrate every time you add food to the aquarium. Over time, this level rises to 40 ppm nitrate. You perform a 25% water change, removing 5 gallons from the aquarium and replacing it with fresh water. The new level of nitrate in the aquarium is around 30 ppm.

If you do not perform regular water changes and continue to add organic material (fish food) into an aquarium, nitrate will eventually build to a toxic level. The exact frequency and size of water changes varies based on the aquariums stocking, but performing a partial water change of 20-30% weekly is usually ideal. Alternatively, larger, less frequent water changes of around 50% can be performed. However large water changes can cause rapid swings in water chemistry, which can be harmful to fish.

Controlling Nitrate Levels with Weekly 30% Water Changes

Testing Your Aquarium Water

It is important to be able to test for ammonia, nitrite, and nitrate while cycling a new tank and periodically in an established aquarium. For this I recommend a test kit such as the API Freshwater Master Test Kit.  You can also use test strips as a quicker way to get a reading on multiple parameters simultaneously.


6

Completed Filtration Install

**Important note: I am not a licensed plumber and this plumbing configuration may not meet building codes in your area. Please check your local regulations before taking on a project like this**

Why Add a Whole House Water Filter

The city water in my area is somewhat hard and sometimes has a chemical odor out of the tap, so I installed a whole house filter system to bring down sediment levels. This means we no longer need to keep a brita filter in the fridge for our drinking water, and I know the water going into all of my aquariums has had the heavy sediment removed.

This system is installed in front of my house's water heater. Removing sediment before water reaches the hot water tank reduces buildup inside, which can extend the life of the appliance.

The installation was pretty simple and I'll go over everything I used for the project here.

Supplies

This system uses two Pentek big blue 20" filter housings with a dual stage 50 / 5 micron sediment filter cartridge in front of a radial flow carbon cartridge. All of the filter parts used are listed below:

Sharkbite fittings and PEX tubing made the plumbing really simple. The process was the same as my fish room sink plumbing project (I listed the tools out in that post). The only difference is here I am working with the water supply line before my water heater, so it is 3/4" pipe rather than 1/2".

Mounting the Filter Housings

The first step was to secure a piece of plywood to the wall to support the weight of the lag screws that hold up the filter brackets. I used wood screws to attach the wood to the studs behind the drywall. Then I used 1/4" x 1" stainless lag screws and washers to attach the filter brackets to the wood. I tied the two housing tops together with a section of PEX before mounting them so that they would be level with each other on the wall.

Filter housings mounted to wall

With the housings mounted, all I had to do was plumb the system into the cold water line coming into the fish room.

Plumbing

Its important to "dry fit" all of your connections before making the pinch clamp connections, in case you need to make changes. Once a piece of PEX is clamped onto a fitting, its difficult (though not impossible) to remove. A 10 foot stick of PEX tubing is cheaper than a brass fitting, so cutting a new piece while testing out your configuration isn't a big deal.

Making a pinch clamp connection

My system has a bypass line with a ball valve above the filter housings so that I can shut off the flow to the filters. Without a bypass, changing the filters would require shutting off the water to the entire house. There is also a ball valve on either side of the filters so that they can be entirely isolated. Water will still flow to all of the downstream fixtures while I change the cartridges.

Sketch out your fish room plumbing before you start
Sketch out your plumbing before you start

I recommend drawing out your plan on paper before you start making connections. This should include the direction of flow through the system. The handle of a ball valve in the open position should point in the direction of water flow. The picture above shows all 3 valves open, but the bypass valve at the top remains closed while the filters are in use.

After I finished the bypass plumbing, I extended the PEX lines up to the ceiling to join with my cold water supply. I made the connection to the copper pipe using a 3/4" sharkbite fitting on both ends of the system.

3/4" Sharkbite Connection

This project took me a few days because I took my time figuring out where I wanted to tap into my existing pipes, but the actual plumbing could be completed in an afternoon if you have it planned out. Based on my usage the filter cartridges should last somewhere between 3-6 months. So I should only have to touch the system a few times a year.

Finished Plumbing
Finished Plumbing