Skip to content

8

DIY Sump for 90 Gallon Aquarium

I built a DIY sump filter for my 90 gallon freshwater aquarium using a standard Aqueon 20 long tank. There are a lot of great advantages to using a sump filter, especially on larger systems. A sump can hold several times more filter media than a hang on back or canister filter. Sumps also allow you to remove equipment, like heaters, from the display tank so that it is out of sight. Finally, since a sump can technically be any container that holds water, there is a lot of room for customization.

Overflow Plumbing

Gluing the Overflow Plumbing

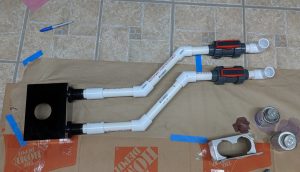
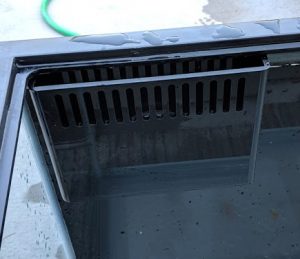
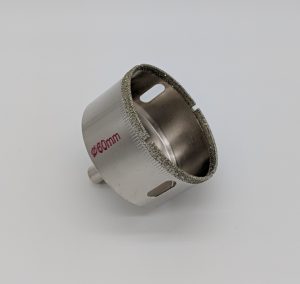
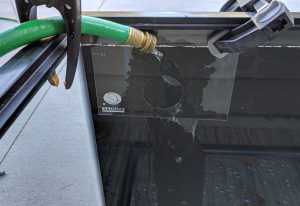
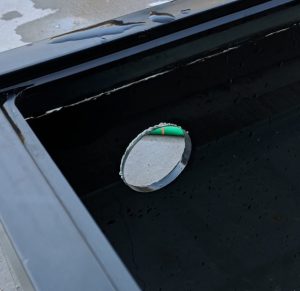
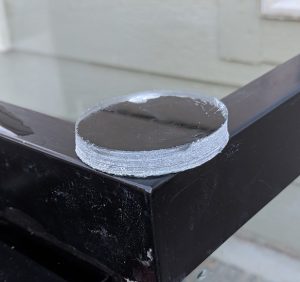
This system is using an Eshopps Eclipse (Medium) overflow, which requires drilling a hole for a 1.5" bulkhead. The overflow has two 1 inch bulkheads, which allows for a Herbie style overflow setup. With this configuration, the primary overflow valve is set partially closed, so that the water level in the overflow box rises to the top of the red secondary, or emergency, standpipe.

Herbie Drain
Herbie Drain

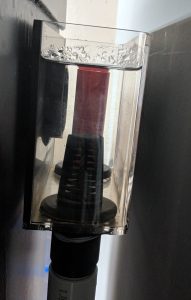
The partially closed ball valve limits the flow through the strainer, maintaining a siphon that runs quietly. A small amount of water flows down the open emergency standpipe. This configuration is popular in reef tanks for its quiet operation and ability to handle a lot of flow without worrying about a clogged strainer causing the display tank to overfill.
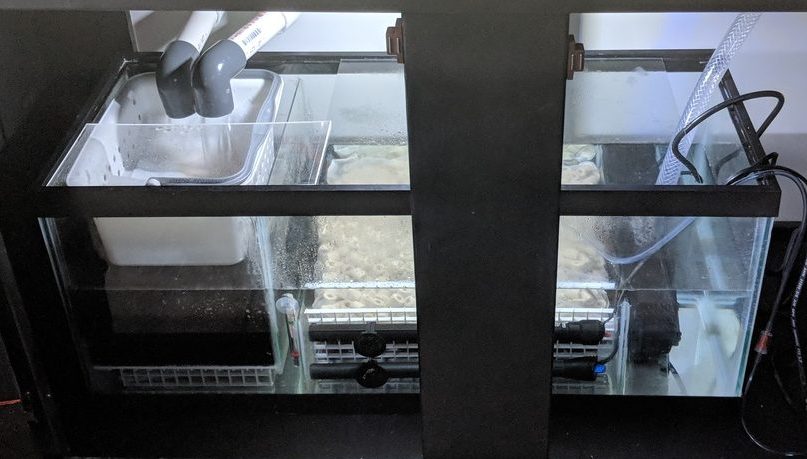
Sump Design

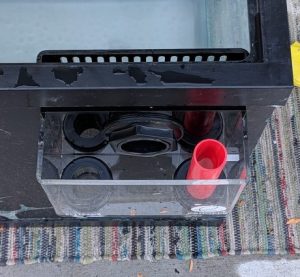
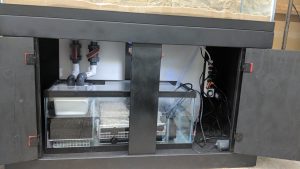
This sump is built from a standard size Aqueon 20-long, with three glass baffles siliconed in place to create the different sections. The first two baffles force water flowing into the sump down through the mechanical media and then up into the second section. The third baffle sets the minimum water level in the sump at about 6", or half the height of the tank. This leaves room for roughly 9 gallons of water to overflow from the display tank into the sump in the event of a power failure or pump failure.

Empty 20 Gallon Sump

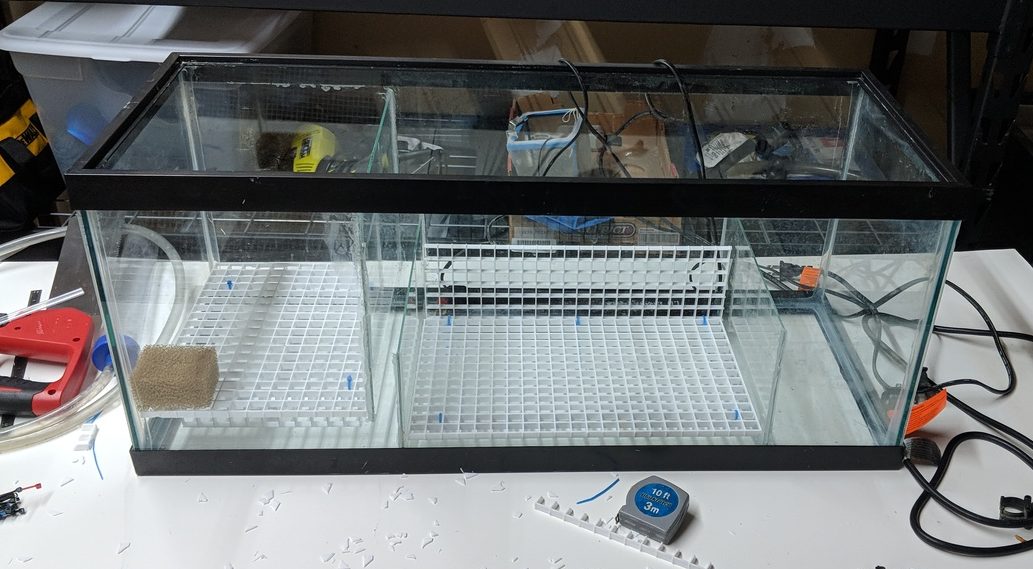
Egg crate style lighting diffuser creates dividers that hold the media in place and keep it off the heaters. I cut sections of the lighting diffuser down using wire snips, and attached the pieces to each other with zip ties. The first section has a platform that holds the media up above the bottom of the first baffle.

Lighting Diffuser Platform

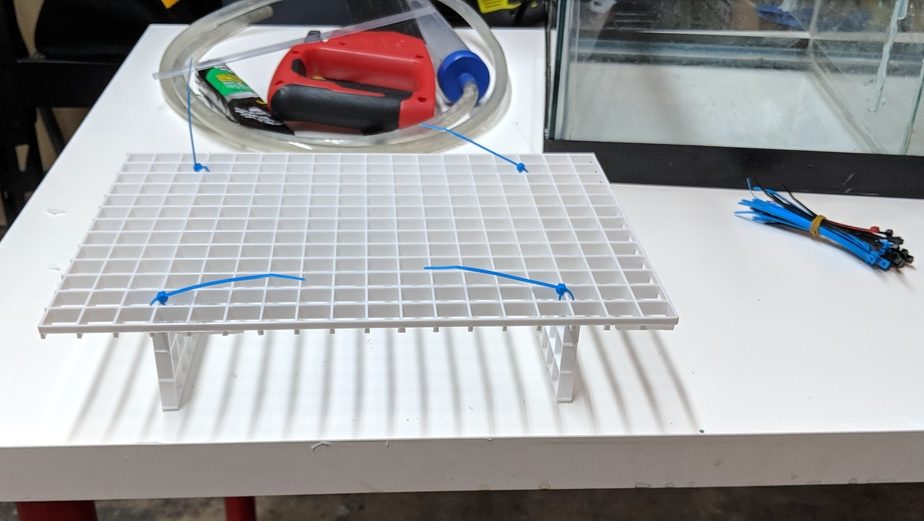
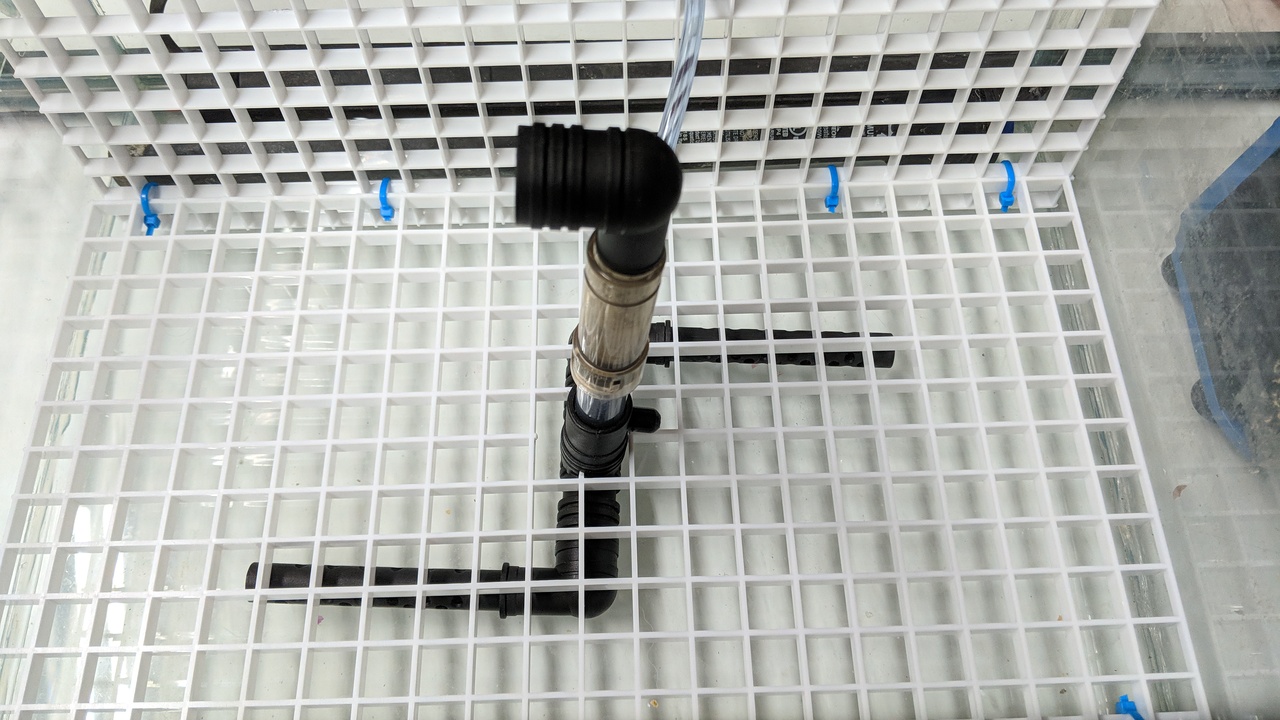
The second section of the sump holds the bio media and heaters. Here I made a platform for the media to sit on, as well as a divider for the heaters. I also made an air driven circulation device using an old sponge filter housing without the sponges. The two intake tubes sit on the glass bottom of the sump below the diffuser, pulling water from the bottom up to the top of the media. The idea was to create more movement across the media and oxygenate the water before it gets returned to the aquarium.

Circulation Lift Tube Installed

Filtration Media

This sump is using a combination of polyester quilt batting, thick sponges, bio rings, and lava rock for filtration. Water flows from the overflow pipes into a basket that holds a layer of polyester batting, which catches most debris and fine particles before they get into the rest of the sump. I covered how cheap and awesome quilt batting is as a filter media in my post about DIY filter hacks.

Polyester Batting
Polyester Batting

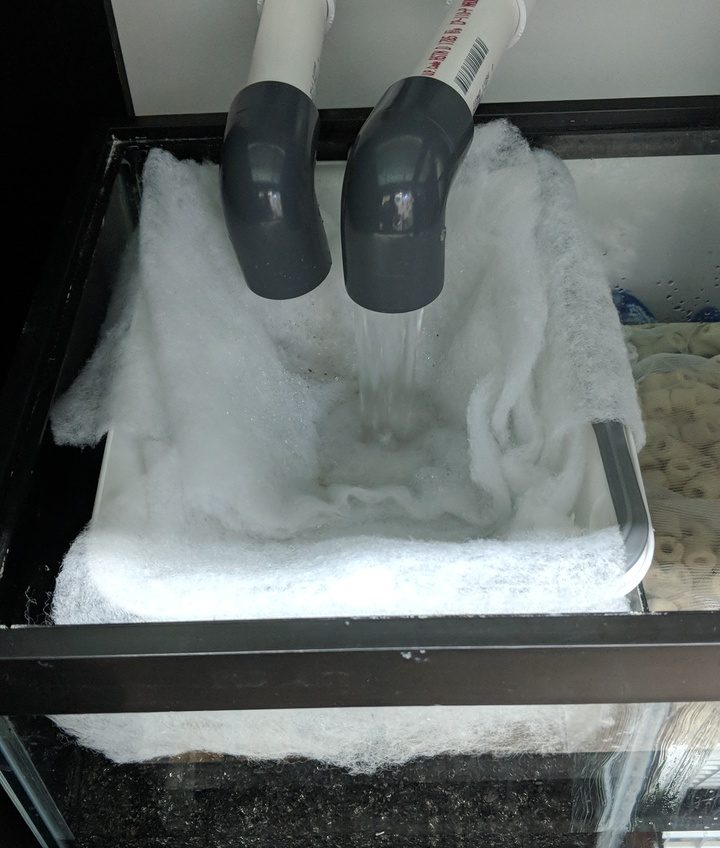
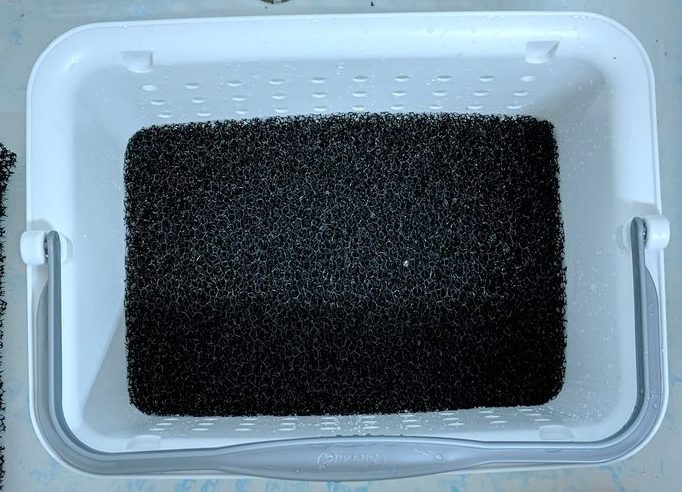
The bottom of the filter basket is lined with a 1 inch think coarse sponge. This traps debris the batting didn't catch and allows the water to drain evenly through the sides and bottom into the 3 inch layer of sponges below.

Mechanical Filtration Basket

In the second chamber is 7 pounds of lava rock, with 4 one-pound bags of bio rings on top. Lava rock is highly porous and often used in pond filters because it is cheap to buy in bulk. I picked up a 7 lb bag for less than $10 at a home improvement store. I got the bags of bio rings, as well as the coarse sponge for the filter basket, from aquariumcoop.com.

Biological Filtration

The heaters are positioned in front of the bio media so they are easily visible and accessible if I need to make an adjustment. The final chamber houses the pump, which sends the water back up to the display. This section has extra space I can use to add activated carbon, purigen, or any extra media I may want to cycle.

DIY Sump in Service
DIY Sump in Service

The entire build for this DIY sump cost me under $100, not including the submersible pump ($20) and overflow ($110). Compare that to canister filters like the Fluval FX4 that, while effective, run well over $250 and provide virtually none of the advantages of a DIY sump.


4

My 90 gallon freshwater aquarium is filtered by a sump made from a 20 gallon long tank. Details on that build will be posted soon. I bought the tank second hand and it came with an Eshopps hang on back overflow, but I decided to drill it after doing a lot of research about different plumbing options. I don't want to have to worry about losing siphon in a HOB overflow, and the Eshopps Eclipse overflow box I chose takes up less space inside the tank and looks cleaner.

Eclipse overflow installed

I bought this aquarium used, so I was not sure what brand it was, but based on the dimensions and the design I believe its a standard Aqueon 90 gallon. This is important to know so that you can determine whether or not the glass is tempered. Aqueon has a great reference sheet that lists the dimensions of all of their tanks and whether they have tempered bottoms. I still checked the sides of the tank with polarized glasses and a cellphone in sunlight to make sure they were not tempered.

Drilling the Tank

The Eshopps Eclipse overflow comes with an included drilling template and diamond coated hole saw. This helped tremendously because it eliminated the need for me to measure and mark where I wanted to drill. I also didn't have to make my own template to get the hole started. The template is a piece of acrylic with a hole sized for a 1.5" bulkhead.

Eclipse Hole Saw and Template
60mm diamond hole saw

To drill the hole I clamped the template onto the inside of the back wall of the tank. With this kit, its important to push the top of the template up to the inside rim of the tank so that the water level isn't set too low. I didn't want to lay such a large aquarium on its side, so I drilled the hole with it upright. I clamped a hose onto the rim of the tank to keep a stream of water on the drill bit.

Eshopps Eclipse Hole Saw Template

The actual drilling was similar to what I covered in my post about drilling 10 gallon aquariums. It took about 15 minutes to drill all the way through the glass. The side of a 90 gallon tank is about 3/8" thick, and I didn't want to go too fast and crack it. I ended up with a nice clean hole for the overflow bulkhead.

Drilled Hole for Overflow Bulkhead
Glass removed by the hole saw

I decided not to drill the tank for a return - because I will probably want to make a spray bar or play around with different returns - so this was the only hole I had to make. Having a drilled overflow makes me feel a lot better about the risk of the tank overflowing. Below is a shot of the overflow box on the back of the tank. I'll go into more detail on the plumbing and filtration for this aquarium in a later update.

Eclipse Overflow Box Installed


1

My local PetSmart frequently marks down their aquatic plants when they begin to "die". Typically, these plants have one or more moldy brown leaves on them. But that doesn't always mean a plant is dead.

I have scored several great anubias plants at 50% off - like the anubias congensis plant below:

anubias marked for quick sale

Selecting "Damaged" Plants

The PetsMart I go to uses large yellow labels to mark these plants down. The last time I stopped in, they had three different packages of anubias priced at 50%. Two of them looked a little too far gone, but one was still in great shape.

When these plants are on the shelf in the store, it can be hard to tell what kind of shape they are in. I try to look through the top of the package and see if I can tell how many undamaged leaves there are. Sometimes there is only one rotten leaf, while other plants might have rotten brown spots on all of their leaves. I look for plants that still have at least 2 healthy green leaves.

In the case of this anubias, I could see that it had several dead leaves but also several green ones. I knew it would be pretty easy to clean up.

anubias right out of packaging

Cleaning Up Store Bought Plants

The first thing I do after opening the package is rinse the plant off in the sink and remove all the dead leaves. Plants from chain stores come packaged with their roots in a gel, so you want to clean all of that stuff off with tap water.

It was at this point I realized this particular anubias was actually two separate rhyzomes, each with about 3 healthy leaves. The regular price on this size plant is $4.99. I got it for $2.69 after tax. Since it ended up being two plants, I paid about $1.34 per plant.

anubias after rinse
anubias after rinse

After I remove dead growth and rinse off the gel, I bleach dip all new plants before they go into one of my aquariums. To do this I add some bleach (estimate a 1:20 solution) to a container of water. I soak new plants in the bleach solution for 5 minutes, then drop them into a bucket of water with a few milliliters of dechlorinator and let them sit another 5 minutes.

The bleach kills snails and algae, and other hitch hikers that might be riding on plants. After the rinse, plants are good to go into an aquarium. I do this with plants I get from other hobbyists and online as well. It only takes a few cells of an aggressive thread algae to multiply in a high nutrient environment and wreck a planted tank. I have had to tear down tanks and throw out plants because they got filled with algae that I couldn't get rid of.

The Result

new anubias added to tank

Above is one of the new anubias congensis rhyzomes in my planted tank. It's already shooting off a new leaf, so it should grow out well.