Skip to content

19

20 long with DIY glass lid

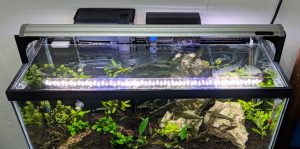
I have DIY glass aquariums lids on three of my planted tanks. They're cheaper to make than almost any lid you can buy commercially and, unlike lids with hinges, they allow a ton of light into the tank.

Each one of these lids cost less than $20 and required no tools to make

Pros & Cons to a DIY Glass Aquarium Lid

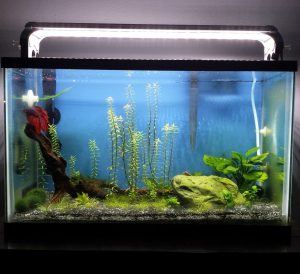
Above you can see a glass lid on my 20 gallon long planted tank. There are a lot of benefits to a solid glass lid like this:

  • It wont become cloudy or discolored over time like plastic lids
  • It wont bend or sag like plastic lids
  • It keeps moisture in the aquarium, and blocks almost no light
  • It is made custom for your application, so you can choose its dimensions

There are only a couple of reasons NOT to use a solid glass lid:

  • This design only works on aquariums with a rim on the top
  • They are breakable, and can cause injury to you or your fish if broken (I have broken one)

In my opinion the benefits definitely outweigh the risks. I have used these lids for years on different aquariums and only ever broken one. No glass actually got into my aquarium, I was moving the lid and not paying enough attention. If you're always careful when handling them, there's not much to worry about.

How to Make a DIY Glass Aquarium Lid

Making one of these lids is very simple. All you need to do is:

1. Measure your aquarium

You want the lid to rest on the ledge inside the plastic rim of the tank, so you'll measure from one inside edge to the other. Then, you have to decide how far across the aquarium you want the lid to extend.
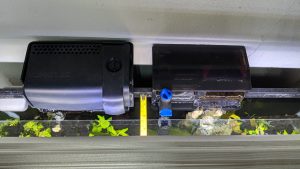
measure top of aquarium

In the photo above you can see my HOB filters extend about 2 inches into the aquarium. I had my lid cut to leave a little more than 2 inches of open space in the back, so that the filters don't contact or spray water onto the glass. This space on the back side is also handy for dropping food into the tank without moving the lid.

2. Have a piece of glass cut to your dimensions

I have always gone to a local hardware store to have pieces of glass cut, but you can also go to a specialty glass shop. I use Ace Hardware in the Denver area, but I have also heard that some Lowes locations will cut glass. You should be able to find a place that will cut glass in your area.

Since this is just a single pane of glass, it should be less than $20, even for a long cut like my 29" lid below. I paid about $10 for that piece of glass that is roughly 29" x 9".

this lid is 29" long

3. Attach hooks for lifting and moving the lid

I use clear command mini hooks as handles for these lids. A pack of these hooks is enough for 4-5 DIY aquarium lids, and only adds a couple dollars to the cost of each one.
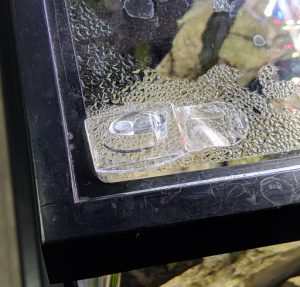
clear hooks
clear hooks

I like these because they blend in with the glass lid, and they stick on extremely well. Once they are attached, you can lift the lid off just using the two hooks as handles.

That's it. These lids are easy to clean using a damp paper towel, and the only maintenance they require is being wiped down once every month or so. As long as you're careful not to drop them, they will last as long as your aquarium.
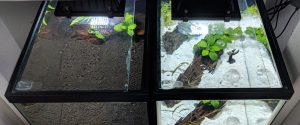
glass lids on my two 10 gallon tanks

If you are interested in other types of DIY aquarium lids, see my post on making lids out of Polycarbonate here.

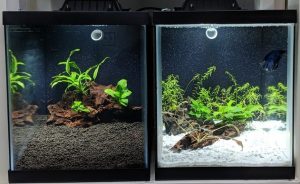
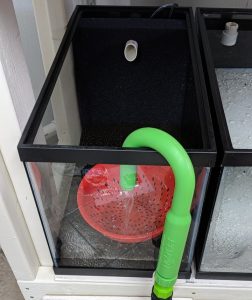
two planted 10 gallons

These two tanks sit on the bottom shelf of my DIY aquarium rack. They are standard aqueon 10 gallon aquariums, but they are positioned with the short sides in the front and back. I've never set up aquariums in this configuration, but I knew it would work really well with how I wanted to drill them. It's also an interesting layout to try to aquascape.

Plumbing

These tanks are drilled with an overflow in the back, which flows out to the main drain stack for the room. See this post for info on how I drilled the glass and this post for the drain system build.

The overflow allows water changes to be done by just adding new water to the tank. Eventually this will be accomplished through an automated drip system operating on a timer. For now I'm doing water changes using my python hook, which makes filling tanks really easy.

filling with python hook

Filtration

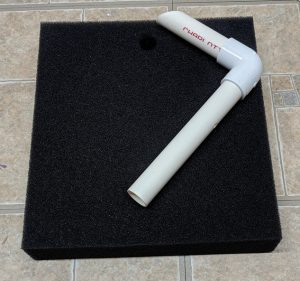
hamburg matten filter

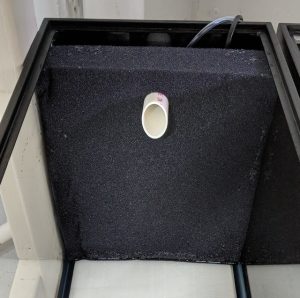
I used hamburg matten filters in these aquariums to hide the overflows and heater at the back of the tank. Matten filters provide a ton of surface area for biological filtration and are excellent for keeping shrimp and small fish away from an overflow. The filter is a thick foam sponge cut to the dimensions of the aquarium, with a hole for a PVC lift tube to fit through.

matten filter installed

The lift tube uses air to pull water up from the bottom of the tank behind the sponge and out the tube in the front. This pulls water through the sponge to the back, trapping debris in the sponge and feeding the beneficial bacteria. The foam sponge also provides a great surface for shrimp to graze on biofilm. I got these matten filters from Flip Aquatics.

Lighting

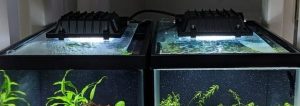
The lights for these aquariums are 20 watt LED floodlights. I am keeping mostly anubias in these tanks so I went with a cheap lighting option since I only need low light. The lights currently sit directly on top of my DIY glass lids. Two of these LED lights only cost me $22.

LED flood lights
LED flood lights

Stocking

Shrimp Tank

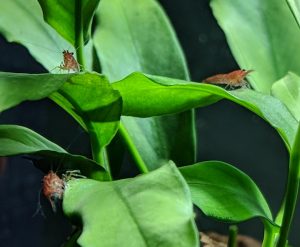
cherry shrimp on anubias

The tank on the left is home to a colony of red cherry shrimp I've had breeding for a long time. I may add a small group of nano fish like celestial pearl danios or white cloud mountain minnows later, probably after the auto water change system is complete.

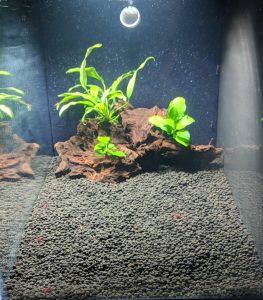
cherry shrimp tank
cherry shrimp tank

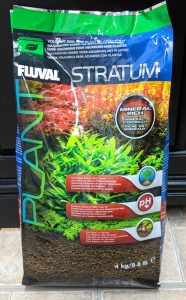
I set this tank up with Fluval Stratum because it is marketed as a shrimp friendly substrate. So far I have been happy with it, although it does require a thorough rinse before you dump into an aquarium. I do like that it has a nice uniform grain size and shape. The substrate is larger than sand but smaller and lighter than most types of gravel.

fluval stratum
fluval stratum

Betta Tank

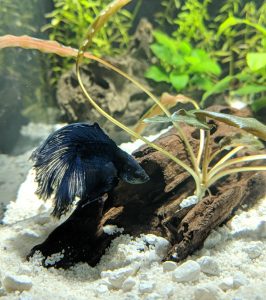
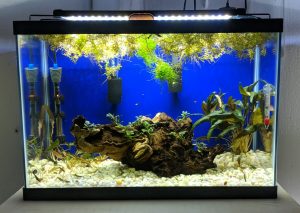
The other tank is home to my male betta. He is alone except for some ramshorn snails. I tried adding some cherry shrimp to his tank, but he hunted them all down and ate them within a day. In the betta tank I used a combination of white sand and white gravel. I like the combination better than using either sand or gravel alone.

betta tank
betta tank

Plants

Both tanks were scaped with easy low light plants.

Shrimp Tank

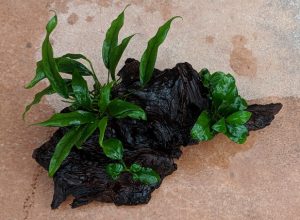
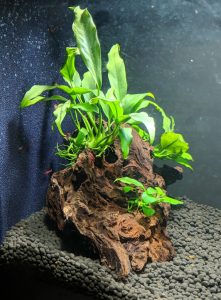
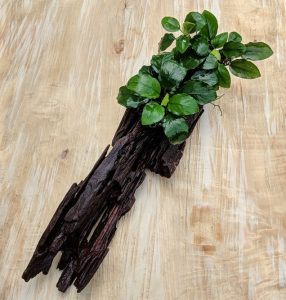
driftwood with anubias

In the shrimp tank I used a single large piece of malaysian driftwood as the only hardscape. I attached to that two anubias nana rhyzomes and another large anubias that I've had for a long time. I used zipties for the larger two rhyzomes, and the smallest one is tucked into an opening in the driftwood. Once the roots attach themselves to the wood, the ties can be removed.

driftwood in shrimp tank

Betta Tank

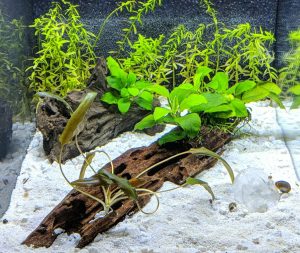
betta tank layout
betta tank layout

In the back of the betta's tank there's a wall of rotala rotundifolia, which is a stem plant that should grow thick if its trimmed regularly. This plant will grow quickly under high light, especially with CO2, but it does fine in a low tech setup.

large anubias rhyzome

I also included two large anubias rhizomes attached to pieces of malaysian driftwood. The anubias plant in the back has been growing on the same piece of wood for several months. The one toward the front is over a year old, and was ziptied to the driftwood. Zip ties were easier than super glue and can be easily snipped off later if I want to make a change.

Finally I have a small cryptocoryne wendtii in the foreground. This plant has some nice red shades in its leaves and grows differently under different lighting conditions. If it does well here I will probably add more crypts to both of these 10 gallon tanks.


2

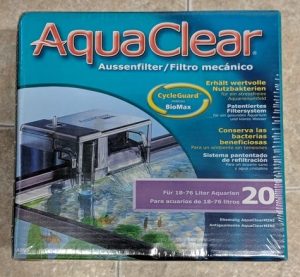
aquaclear 20
aquaclear 20

The Fluval AquaClear is a hang on back (HOB) aquarium filter that comes in five different sizes: 20, 30, 50, 70, and 110. In my opinion the AquaClear is the best value HOB filter you can buy. It costs slightly more than most of the big box store brands, such as Aqueon or Marina, because it is definitely a premium product. Its defining feature is its media basket and the volume of filter media it is designed to accommodate.

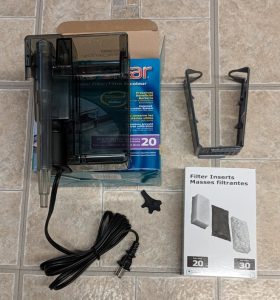
unboxed aquaclear filter
unboxed AquaClear filter

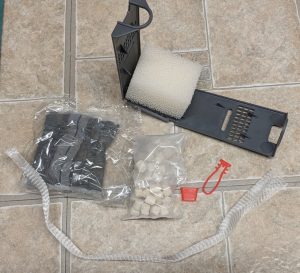
Above is a brand new un-boxed AquaClear filter. Included in the kit you receive the filter, the media basket, and one set of media. The standard configuration comes with one foam sponge, one bag of activated carbon, and a bag of bio rings. Below is an example of a brand new media basket with starter media.

standard media
standard media

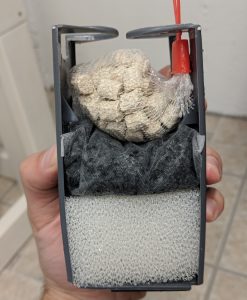
These baskets are the key to the AquaClear's greatness. They make cleaning the filter extremely easy because they slide in and out easily while keeping the media in place. As water enters the filter it rises from the bottom of the basket up to the top. In this way the AquaClear functions similarly to a canister filter, where the media is stacked in layers.

aquaclear media basket
AquaClear media basket

Most HOB filters feature one thin layer of sponge and a disposable filter floss insert, requiring frequent replacement of the disposable insert. The AquaClear packs a lot more biological filtration capability. And if configured correctly, it never requires media replacement. This makes it a very cheap filter to operate. You may save $10 buying a cheaper HOB up front, but over one year you will spend several times that on disposable filter inserts.

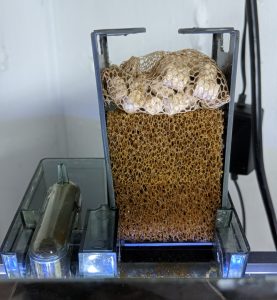
Fluval's foam inserts are great for both mechanical and biological filtration. They trap debris as water passes through them, and have a huge surface area to culture bacteria. Rather than using the carbon bag, I recommend running the AquaClear with two foam insert sponges. Carbon is not really necessary unless you are specifically trying to remove medication or heavy metals, and two sponges will give you a lot more mechanical filtering capacity.

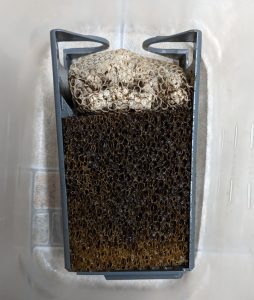
dirty media basket
dirty media basket with two sponges

As you can see above, the foam inserts trap a huge amount of debris, eventually turning brown. The best thing about them is they never have to be replaced; you just squeeze them out in a bucket of aquarium water to clean them. Below is the same media basket after being rinsed out. Using aquarium water maintains the colony of beneficial bacteria that convert ammonia from fish waste into nitrite and then nitrate. Rinsing a filter sponge in tap water that contains chlorine or chloramine can kill off this bacteria.

clean media basket
clean media basket with two sponges

The quality of the Fluval media is tough to beat, which is what I think makes the AquaClear one of the best all around HOB filters you can buy. I do use other HOB models in my fish room, but I don't purchase the OEM filter refill inserts for any of them.  This post covers how I maintain my other filters economically using DIY methods.

I run an AquaClear 20 on my 20 gallon guppy tank (with an intake sponge) and have had great results. I have also used the same filter for a shrimp tank, and a 10 gallon betta tank.

betta tank running aquaclear 20
guppy tank running aquaclear 20

Note: I did not receive compensation or free products from Fluval for this review.