
**Important note: I am not a licensed plumber and this plumbing configuration may not meet building codes in your area. Please check your local regulations before taking on a project like this**
Why Add a Whole House Water Filter
The city water in my area is somewhat hard and sometimes has a chemical odor out of the tap, so I installed a whole house filter system to bring down sediment levels. This means we no longer need to keep a brita filter in the fridge for our drinking water, and I know the water going into all of my aquariums has had the heavy sediment removed.
This system is installed in front of my house's water heater. Removing sediment before water reaches the hot water tank reduces buildup inside, which can extend the life of the appliance.
The installation was pretty simple and I'll go over everything I used for the project here.
Supplies
This system uses two Pentek big blue 20" filter housings with a dual stage 50 / 5 micron sediment filter cartridge in front of a radial flow carbon cartridge. All of the filter parts used are listed below:
- Pentek 20-BB 3/4" Big Blue Filter Housing with Pressure Relief
- Pentek Filter Wrench
- Big Blue Mounting Bracket x 2
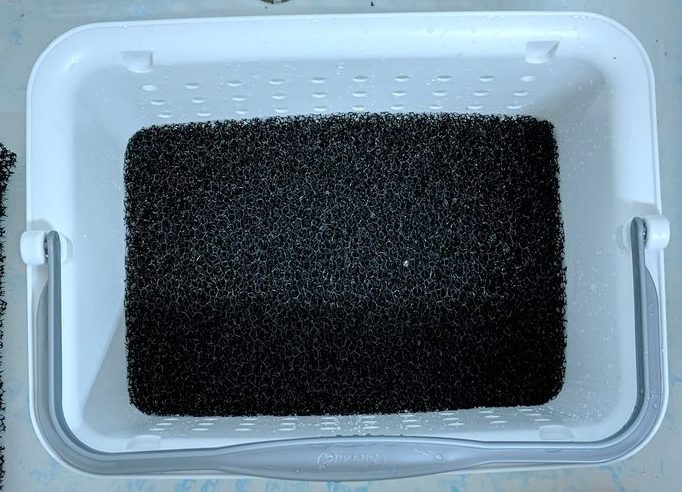
- Pentek 20" Carbon Filter Cartridge
- Pentek 20" Dual Gradient Density Polypropylene Sediment Cartridge
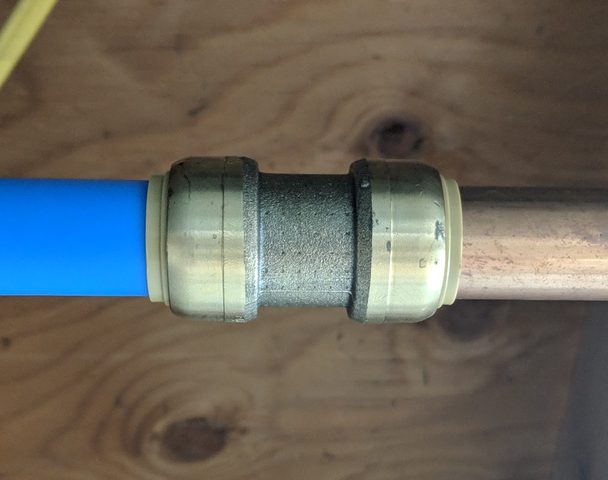
Sharkbite fittings and PEX tubing made the plumbing really simple. The process was the same as my fish room sink plumbing project (I listed the tools out in that post). The only difference is here I am working with the water supply line before my water heater, so it is 3/4" pipe rather than 1/2".
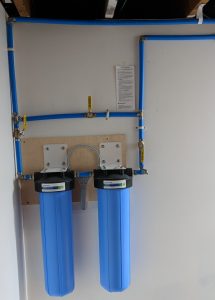
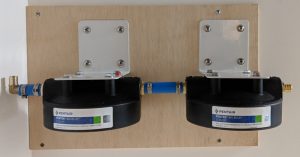
Mounting the Filter Housings
The first step was to secure a piece of plywood to the wall to support the weight of the lag screws that hold up the filter brackets. I used wood screws to attach the wood to the studs behind the drywall. Then I used 1/4" x 1" stainless lag screws and washers to attach the filter brackets to the wood. I tied the two housing tops together with a section of PEX before mounting them so that they would be level with each other on the wall.
With the housings mounted, all I had to do was plumb the system into the cold water line coming into the fish room.
Plumbing
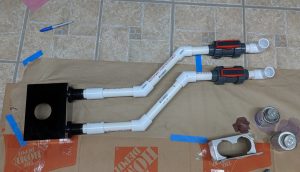
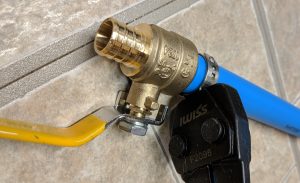
Its important to "dry fit" all of your connections before making the pinch clamp connections, in case you need to make changes. Once a piece of PEX is clamped onto a fitting, its difficult (though not impossible) to remove. A 10 foot stick of PEX tubing is cheaper than a brass fitting, so cutting a new piece while testing out your configuration isn't a big deal.
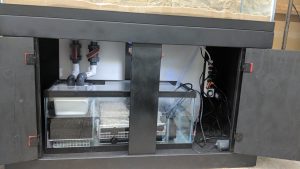
My system has a bypass line with a ball valve above the filter housings so that I can shut off the flow to the filters. Without a bypass, changing the filters would require shutting off the water to the entire house. There is also a ball valve on either side of the filters so that they can be entirely isolated. Water will still flow to all of the downstream fixtures while I change the cartridges.
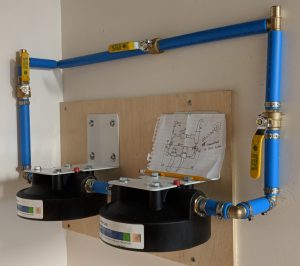
I recommend drawing out your plan on paper before you start making connections. This should include the direction of flow through the system. The handle of a ball valve in the open position should point in the direction of water flow. The picture above shows all 3 valves open, but the bypass valve at the top remains closed while the filters are in use.
After I finished the bypass plumbing, I extended the PEX lines up to the ceiling to join with my cold water supply. I made the connection to the copper pipe using a 3/4" sharkbite fitting on both ends of the system.
This project took me a few days because I took my time figuring out where I wanted to tap into my existing pipes, but the actual plumbing could be completed in an afternoon if you have it planned out. Based on my usage the filter cartridges should last somewhere between 3-6 months. So I should only have to touch the system a few times a year.