Since my fish room is in an unfinished section of my basement there weren't any outlets along the wall where most of my tanks will be going. In fact, the only available outlets in the room were on the same circuit as my washing machine, which pulls about 10 amps by itself. I estimated that the number of aquariums I plan to eventually run in this room would eat up 7 or 8 amps, potentially more if I include one or two high-light planted tanks.
I'm taking my time with each upgrade to the fish room to make sure that I build in the ability to expand by adding more tanks if I want to later. (See my fish room sink plumbing as an example) I thought about running an extension cord from a nearby circuit, but ultimately I decided to have a dedicated, 15 amp GFCI circuit installed by an electrician. Although I'm doing all of the plumbing and building the racks myself, I don't like to mess around with electricity, especially at the service panel.
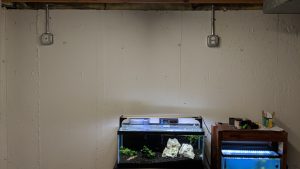
Fish Room Under Construction - Dedicated Circuit Installed
I had the receptacles mounted a little over 6 feet up the wall so that they would be above the tops of the tanks. With a 15 amp circuit just for my aquariums I'll have plenty of power for the 10+ tanks I plan to eventually run. I'll also have power for additional devices like a sprinkler timer and dehumidifier. Once I start setting up racks this wall will be a lot more full, and I'll be able to mount power strips to each rack without running extension cords along the floor or around the room.
I recently bought a house that has a good space to dedicate to building a fish room, and I'll be posting about my progress getting it set up. I'm doing everything myself - except some electrical work, more on that in a later update - and I'll break it down into steps someone else wanting to setup a fish room might actually be able to follow.
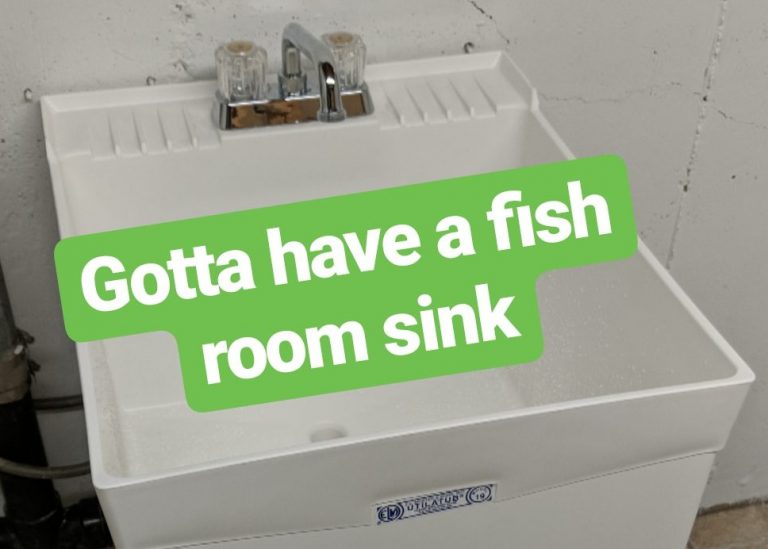
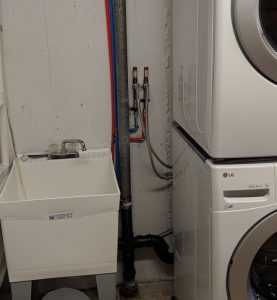
Old Plumbing (new sink shown)
My fish room is in the only unfinished room in the house, which is also the laundry room. The space is ideal because it has a floor drain and a sink, but I had to re-arrange it to give myself more space for aquariums. The previous owners did not have stacking laundry machines, so the room was plumbed in a way that put the washing machine and the dryer on opposite sides of the sink. I wanted to put in stacking units, and because of the room's layout I needed to stack them where the existing sink was.
I decided I needed to replace the sink and move it, flip the drain lines for the sink and the washer, and re-route the hot and cold water lines using PEX tubing.
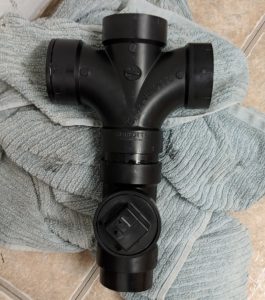
New Drain Assembly
Luckily the existing ABS drain assembly was held in place by shielded couplings that I was able to remove easily. I built a mirror image copy of the existing drain assembly and installed it between the existing sections of cast iron pipe coming from the ceiling and up from the floor with new couplings. I cut the ABS with a hacksaw and cemented it together, which was a lot easier than I expected. The challenge was getting the vertical section to the exact length that would fit between the iron pipe coming from upstairs and the section of pipe going down into the floor.
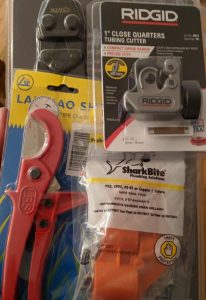
PEX Tools
Once I had the drains switched I started cutting out the existing copper supply pipes at the ceiling. I used a handheld pipe cutter that rotates around the pipe which cut through them like butter. Then I used half inch shark bite fittings to join my red and blue PEX to the existing copper lines. I had to buy a PEX cutter and clamp tool, both of which were easy to use and made installing the new lines go really fast. Links for all of the tools I used here are listed at the bottom of the post.
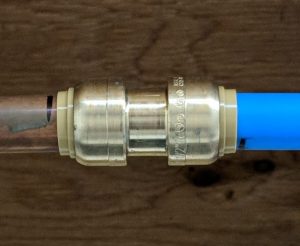
1/2" Sharkbite fitting - copper to PEX
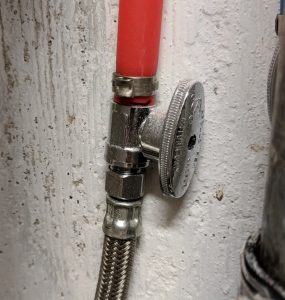
For the sink connections I used some threaded/PEX barb valve fittings at the end of the PEX line so I could screw the faucet hoses onto the threaded fitting.
Sink hot water connection
For the washing machine I wanted to keep the existing water hammer arrestors, so I just cut them off the old copper pipe and used 2 more sharkbite fittings to join them to my PEX line. The sharkbite fittings haven't leaked at all and they were the easiest thing to install. You just need a deburring tool (see tool links below) to make sure there are no sharp edges on the PEX or copper that would damage the internal O-ring that keeps the sharkbite sealed.
New Standpipe Installed
The faucet I installed on the utility sink has a threaded nozzle so that I can attach a hose or python for doing water changes. Eventually I will probably be installing an automatic top-off water line that operates on a timer to keep all of my aquariums full and allows me to do automatic water changes. But that project is a few months out. The nice thing about the PEX tubing is it will be easy to splice in a couple of tees and run that new line.
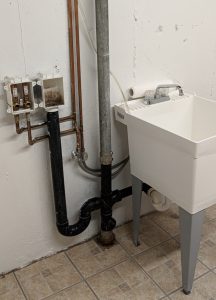
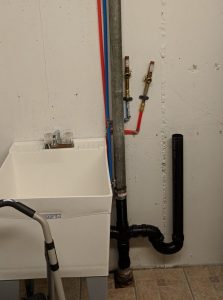
New Plumbing Finished
The last challenge I had was securing the PEX lines to the concrete wall. I had to buy a hammer drill to make pilot holes for concrete anchors. I got a cheap refurbished model that worked fine for the few holes I needed to drill. In the final photo you can see the PEX is nice and clean and I haven't had any leaks after a couple weeks of regular use.
I'm currently working on another phase of the fish room setup: installing a water filtration system that will serve the fish room and the rest of the house.