Skip to content

4

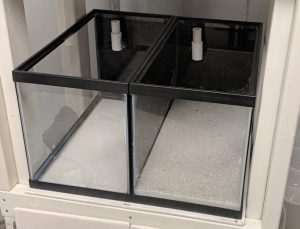
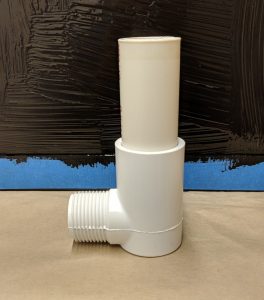
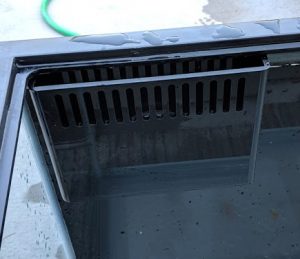
My 90 gallon freshwater aquarium is filtered by a sump made from a 20 gallon long tank. Details on that build will be posted soon. I bought the tank second hand and it came with an Eshopps hang on back overflow, but I decided to drill it after doing a lot of research about different plumbing options. I don't want to have to worry about losing siphon in a HOB overflow, and the Eshopps Eclipse overflow box I chose takes up less space inside the tank and looks cleaner.

Eclipse overflow installed

I bought this aquarium used, so I was not sure what brand it was, but based on the dimensions and the design I believe its a standard Aqueon 90 gallon. This is important to know so that you can determine whether or not the glass is tempered. Aqueon has a great reference sheet that lists the dimensions of all of their tanks and whether they have tempered bottoms. I still checked the sides of the tank with polarized glasses and a cellphone in sunlight to make sure they were not tempered.

Drilling the Tank

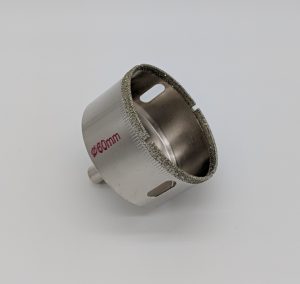
The Eshopps Eclipse overflow comes with an included drilling template and diamond coated hole saw. This helped tremendously because it eliminated the need for me to measure and mark where I wanted to drill. I also didn't have to make my own template to get the hole started. The template is a piece of acrylic with a hole sized for a 1.5" bulkhead.

Eclipse Hole Saw and Template
60mm diamond hole saw

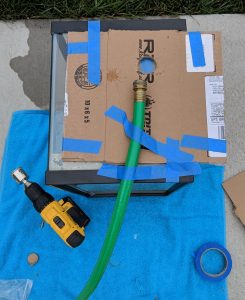
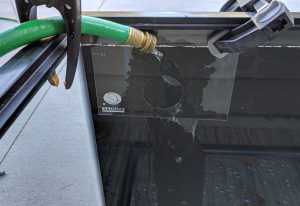
To drill the hole I clamped the template onto the inside of the back wall of the tank. With this kit, its important to push the top of the template up to the inside rim of the tank so that the water level isn't set too low. I didn't want to lay such a large aquarium on its side, so I drilled the hole with it upright. I clamped a hose onto the rim of the tank to keep a stream of water on the drill bit.

Eshopps Eclipse Hole Saw Template

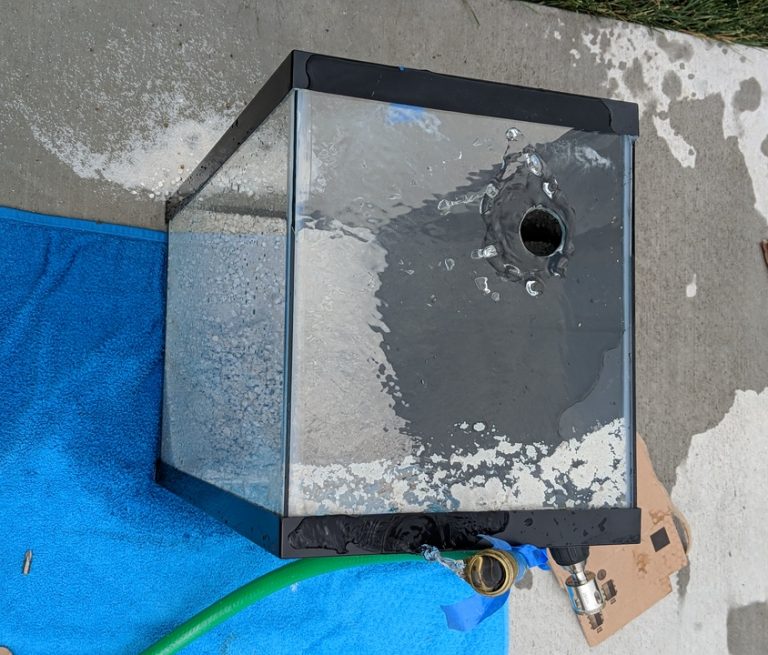
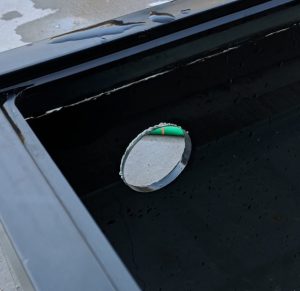
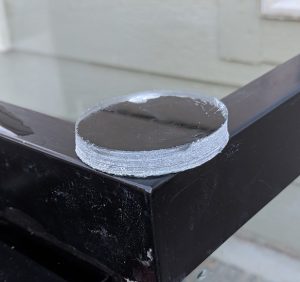
The actual drilling was similar to what I covered in my post about drilling 10 gallon aquariums. It took about 15 minutes to drill all the way through the glass. The side of a 90 gallon tank is about 3/8" thick, and I didn't want to go too fast and crack it. I ended up with a nice clean hole for the overflow bulkhead.

Drilled Hole for Overflow Bulkhead
Glass removed by the hole saw

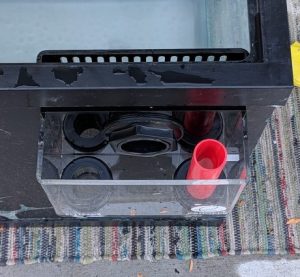
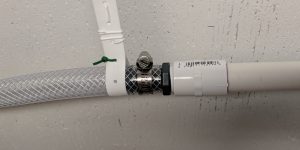
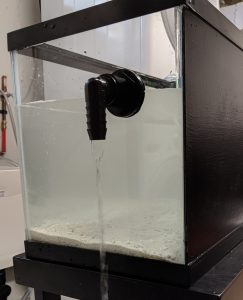
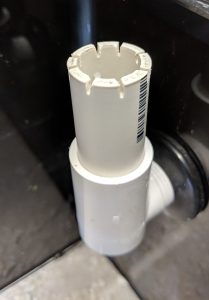
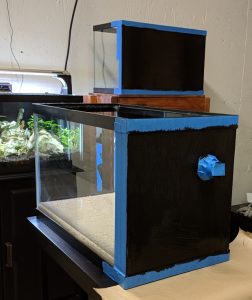
I decided not to drill the tank for a return - because I will probably want to make a spray bar or play around with different returns - so this was the only hole I had to make. Having a drilled overflow makes me feel a lot better about the risk of the tank overflowing. Below is a shot of the overflow box on the back of the tank. I'll go into more detail on the plumbing and filtration for this aquarium in a later update.

Eclipse Overflow Box Installed


I'm installing an automatic water change system on two 10 gallon aquariums. This post will cover how I set up the overflow drain system. See this post about drilling the tanks for more on installing the bulkheads. You can see the overflows installed on the tanks below.

drilled ten gallons on rack

Once the bulkheads and overflows were installed in the aquariums I assembled a drain manifold to mount on the back of the rack. The manifold is built from 3/4" PVC, and connected to the overflows using 3/4" braided PVC tubing. It is mounted to the back of the stand so none of the components are visible from the front.

drain manifold
drain manifold

The manifold has two slip x thread tees that allowed me to thread in hose barb attachments. It also has a vented standpipe at the end to allow air into the system so that water can drain without creating a siphon. The cap on the standpipe has a 3/8" hole drilled into it for air flow. After dry fitting everything, I glued all of the connections except the cap. The threaded connections were made using plumbers tape.

overflow tubing connections

The PVC drain assembly runs into another section of braided PVC tubing, again using a thread x hose barb connection. Plastic pipe hanging straps suspend the line at the right height for each section so that it has a consistent slope. The end point of this line is about 17" inches off the ground, and the bottom of the aquariums is at about 21". The total length of the line is 12 feet. So I have a consistent 1/3" drop per foot, which meets the local plumbing code minimum of 1/4" per foot.

drain hose connection

The drain line then runs across the room and connects to the drain of my utility sink. I used this branch tailpiece to make that connection. This allows the aquarium overflow drain to use the sink's P-trap. The branch tailpiece has a hose barb for 3/4" tubing, I just slid the tubing over it and used a hose clamp to keep it in place.

under sink drain connection

Now I'm in the process of setting up the two tanks attached to this drain system. So far I've run quite a bit of water through the overflows and haven't seen any leaks at all. There shouldn't be any failures because the system is a passive vented drain, so its not under any pressure.

I'll be posting a complete walk through of both 10 gallon setups as soon as they're ready. Currently the plan is for one to be a new home for my cherry shrimp colony, and one to house my male betta. Bothwill be planted tanks running a setup I've never used before, so the results will be interesting.

1

This weekend I drilled two 10 gallon aquariums and installed overflows for an automated water change system. This was my first time drilling an aquarium and it went really smoothly. These two tanks are going onto the new rack that I built (see post). Eventually they will overflow into a drain manifold that connects into the sink plumbing - I'll post more on that project when it's complete.

To install these overflows I used a diamond coated drill bit and 3/4" bulkheads from bulk reef supply. I did a lot of research and read a lot of conflicting opinions on drilling 10 gallon aquariums. Many people say the glass is too thin to be drilled, but I made two holes without cracking a tank. I even had an extra 10 gallon on hand in case I shattered one, but I didn't end up needing it.

water testing new bulkhead

Setting up for drilling the glass took longer than the actual drilling. I used a couple pieces of cardboard taped together as a guide for my drill bit. A piece of wood would have been better, but the cardboard held long enough for me to get the holes started. Without a guide to start the hole, the bit jumps all over the glass and scratches it up.

drilling setup
drilling setup

I taped the cardboard guide onto the side of the aquarium. Then I placed a piece of tape on the inside of the glass to catch the cutout piece. Finally I taped my garden hose onto the tank to keep water flowing over the bit while I drilled. This part is important. You need a steady stream of cool water to remove glass particles and cool the bit as you drill.

drilled hole
drilled hole

To make the holes I put my drill on the lowest setting and went as slow as I could. I could hear the diamond bit grinding the glass and slowed down whenever it started to screech. It took about 2 minutes to make each hole. You don't want to put any pressure on the drill, just letting the weight of the drill bite into the glass. I think a lot of people shatter their tanks doing this because they try to go too fast.

overflow assembly
overflow assembly

The overflow assembly (shown above) cost me about $2 in parts from home depot. My bulkheads are thread x thread, so making connections is simple. I used a threaded 3/4" street elbow, and cut a piece of PVC to the height I wanted to set my water level to. Then I used a dremel with a cutting wheel attachment to make 8 notches in the top of the pipe.

notched overflow
notched overflow

After I installed the bulkheads and overflows I painted two sides of both aquariums using black acrylic paint. The two tanks are going side by side on the shelf with the overflows in the back. I'm still waiting on some plumbing parts and the filters for these two tanks, so the final setup will be in a subsequent update.

painted drilled aquariums
drilled ten gallons on rack

Links to aquarium overflow parts on Amazon for your own DIY projects: