Skip to content

2

aquaclear 20
aquaclear 20

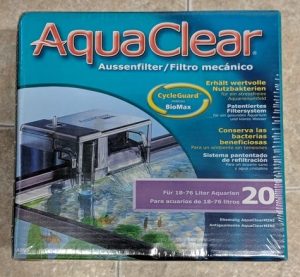
The Fluval AquaClear is a hang on back (HOB) aquarium filter that comes in five different sizes: 20, 30, 50, 70, and 110. In my opinion the AquaClear is the best value HOB filter you can buy. It costs slightly more than most of the big box store brands, such as Aqueon or Marina, because it is definitely a premium product. Its defining feature is its media basket and the volume of filter media it is designed to accommodate.

unboxed aquaclear filter
unboxed AquaClear filter

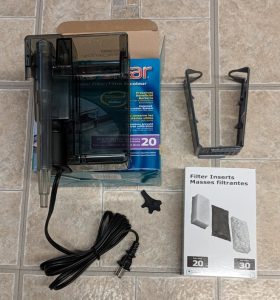
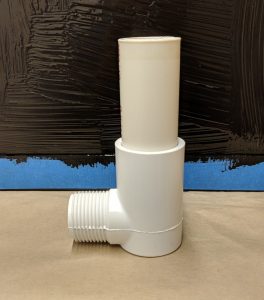
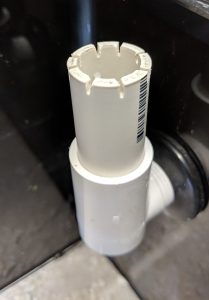
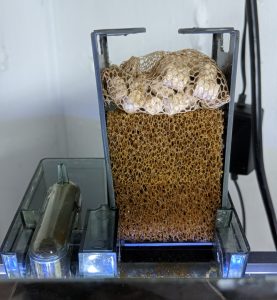
Above is a brand new un-boxed AquaClear filter. Included in the kit you receive the filter, the media basket, and one set of media. The standard configuration comes with one foam sponge, one bag of activated carbon, and a bag of bio rings. Below is an example of a brand new media basket with starter media.

standard media
standard media

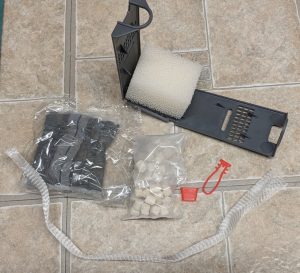
These baskets are the key to the AquaClear's greatness. They make cleaning the filter extremely easy because they slide in and out easily while keeping the media in place. As water enters the filter it rises from the bottom of the basket up to the top. In this way the AquaClear functions similarly to a canister filter, where the media is stacked in layers.

aquaclear media basket
AquaClear media basket

Most HOB filters feature one thin layer of sponge and a disposable filter floss insert, requiring frequent replacement of the disposable insert. The AquaClear packs a lot more biological filtration capability. And if configured correctly, it never requires media replacement. This makes it a very cheap filter to operate. You may save $10 buying a cheaper HOB up front, but over one year you will spend several times that on disposable filter inserts.

Fluval's foam inserts are great for both mechanical and biological filtration. They trap debris as water passes through them, and have a huge surface area to culture bacteria. Rather than using the carbon bag, I recommend running the AquaClear with two foam insert sponges. Carbon is not really necessary unless you are specifically trying to remove medication or heavy metals, and two sponges will give you a lot more mechanical filtering capacity.

dirty media basket
dirty media basket with two sponges

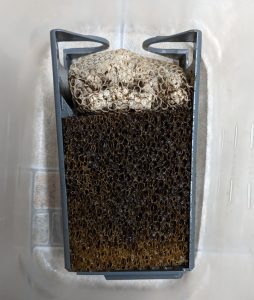
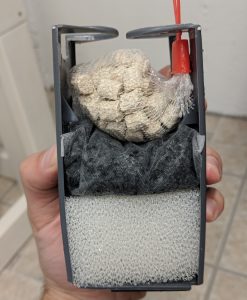
As you can see above, the foam inserts trap a huge amount of debris, eventually turning brown. The best thing about them is they never have to be replaced; you just squeeze them out in a bucket of aquarium water to clean them. Below is the same media basket after being rinsed out. Using aquarium water maintains the colony of beneficial bacteria that convert ammonia from fish waste into nitrite and then nitrate. Rinsing a filter sponge in tap water that contains chlorine or chloramine can kill off this bacteria.

clean media basket
clean media basket with two sponges

The quality of the Fluval media is tough to beat, which is what I think makes the AquaClear one of the best all around HOB filters you can buy. I do use other HOB models in my fish room, but I don't purchase the OEM filter refill inserts for any of them.  This post covers how I maintain my other filters economically using DIY methods.

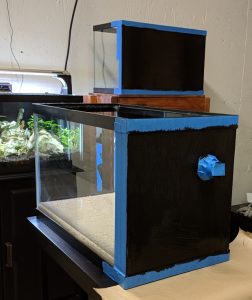
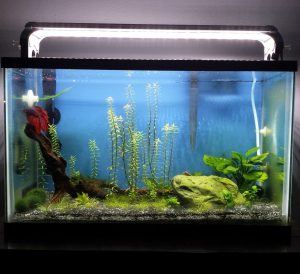
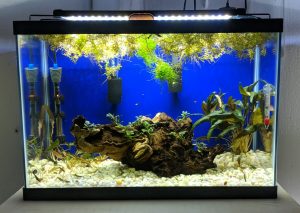
I run an AquaClear 20 on my 20 gallon guppy tank (with an intake sponge) and have had great results. I have also used the same filter for a shrimp tank, and a 10 gallon betta tank.

betta tank running aquaclear 20
guppy tank running aquaclear 20

Note: I did not receive compensation or free products from Fluval for this review.


I'm installing an automatic water change system on two 10 gallon aquariums. This post will cover how I set up the overflow drain system. See this post about drilling the tanks for more on installing the bulkheads. You can see the overflows installed on the tanks below.

drilled ten gallons on rack

Once the bulkheads and overflows were installed in the aquariums I assembled a drain manifold to mount on the back of the rack. The manifold is built from 3/4" PVC, and connected to the overflows using 3/4" braided PVC tubing. It is mounted to the back of the stand so none of the components are visible from the front.

drain manifold
drain manifold

The manifold has two slip x thread tees that allowed me to thread in hose barb attachments. It also has a vented standpipe at the end to allow air into the system so that water can drain without creating a siphon. The cap on the standpipe has a 3/8" hole drilled into it for air flow. After dry fitting everything, I glued all of the connections except the cap. The threaded connections were made using plumbers tape.

overflow tubing connections

The PVC drain assembly runs into another section of braided PVC tubing, again using a thread x hose barb connection. Plastic pipe hanging straps suspend the line at the right height for each section so that it has a consistent slope. The end point of this line is about 17" inches off the ground, and the bottom of the aquariums is at about 21". The total length of the line is 12 feet. So I have a consistent 1/3" drop per foot, which meets the local plumbing code minimum of 1/4" per foot.

drain hose connection

The drain line then runs across the room and connects to the drain of my utility sink. I used this branch tailpiece to make that connection. This allows the aquarium overflow drain to use the sink's P-trap. The branch tailpiece has a hose barb for 3/4" tubing, I just slid the tubing over it and used a hose clamp to keep it in place.

under sink drain connection

Now I'm in the process of setting up the two tanks attached to this drain system. So far I've run quite a bit of water through the overflows and haven't seen any leaks at all. There shouldn't be any failures because the system is a passive vented drain, so its not under any pressure.

I'll be posting a complete walk through of both 10 gallon setups as soon as they're ready. Currently the plan is for one to be a new home for my cherry shrimp colony, and one to house my male betta. Bothwill be planted tanks running a setup I've never used before, so the results will be interesting.

1

This weekend I drilled two 10 gallon aquariums and installed overflows for an automated water change system. This was my first time drilling an aquarium and it went really smoothly. These two tanks are going onto the new rack that I built (see post). Eventually they will overflow into a drain manifold that connects into the sink plumbing - I'll post more on that project when it's complete.

To install these overflows I used a diamond coated drill bit and 3/4" bulkheads from bulk reef supply. I did a lot of research and read a lot of conflicting opinions on drilling 10 gallon aquariums. Many people say the glass is too thin to be drilled, but I made two holes without cracking a tank. I even had an extra 10 gallon on hand in case I shattered one, but I didn't end up needing it.

water testing new bulkhead

Setting up for drilling the glass took longer than the actual drilling. I used a couple pieces of cardboard taped together as a guide for my drill bit. A piece of wood would have been better, but the cardboard held long enough for me to get the holes started. Without a guide to start the hole, the bit jumps all over the glass and scratches it up.

drilling setup
drilling setup

I taped the cardboard guide onto the side of the aquarium. Then I placed a piece of tape on the inside of the glass to catch the cutout piece. Finally I taped my garden hose onto the tank to keep water flowing over the bit while I drilled. This part is important. You need a steady stream of cool water to remove glass particles and cool the bit as you drill.

drilled hole
drilled hole

To make the holes I put my drill on the lowest setting and went as slow as I could. I could hear the diamond bit grinding the glass and slowed down whenever it started to screech. It took about 2 minutes to make each hole. You don't want to put any pressure on the drill, just letting the weight of the drill bite into the glass. I think a lot of people shatter their tanks doing this because they try to go too fast.

overflow assembly
overflow assembly

The overflow assembly (shown above) cost me about $2 in parts from home depot. My bulkheads are thread x thread, so making connections is simple. I used a threaded 3/4" street elbow, and cut a piece of PVC to the height I wanted to set my water level to. Then I used a dremel with a cutting wheel attachment to make 8 notches in the top of the pipe.

notched overflow
notched overflow

After I installed the bulkheads and overflows I painted two sides of both aquariums using black acrylic paint. The two tanks are going side by side on the shelf with the overflows in the back. I'm still waiting on some plumbing parts and the filters for these two tanks, so the final setup will be in a subsequent update.

painted drilled aquariums
drilled ten gallons on rack

Links to aquarium overflow parts on Amazon for your own DIY projects: