Skip to content

1

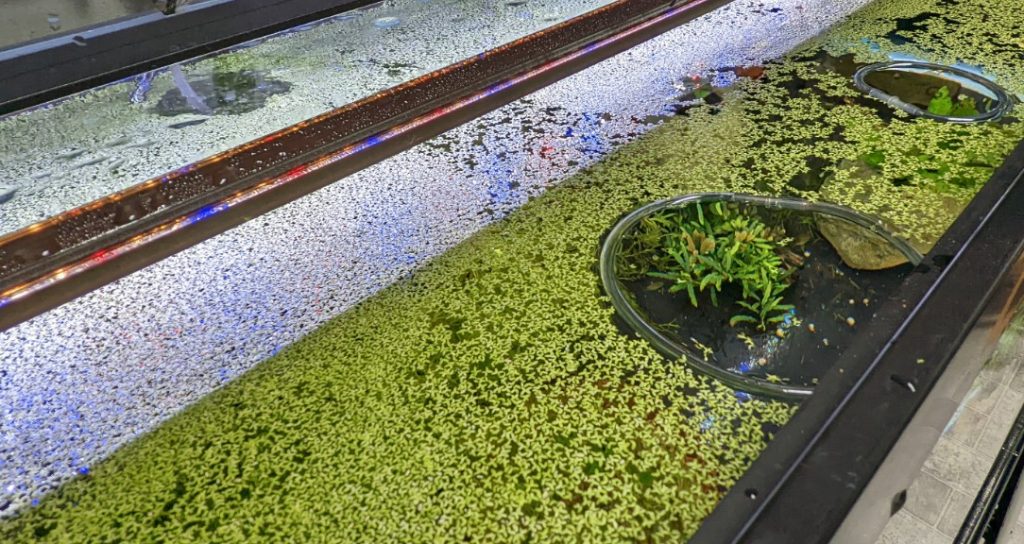
If you've ever introduced duckweed to your aquarium - intentionally or otherwise - you may have run into this common problem:

Duckweed Covered Aquarium

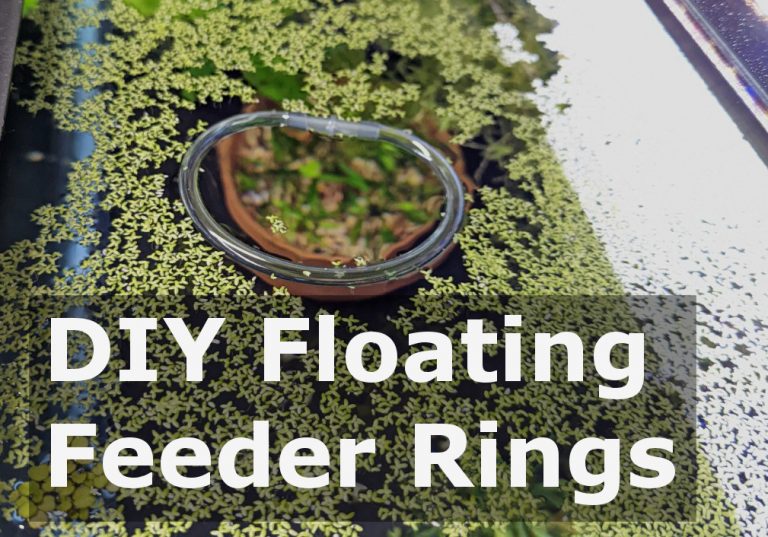
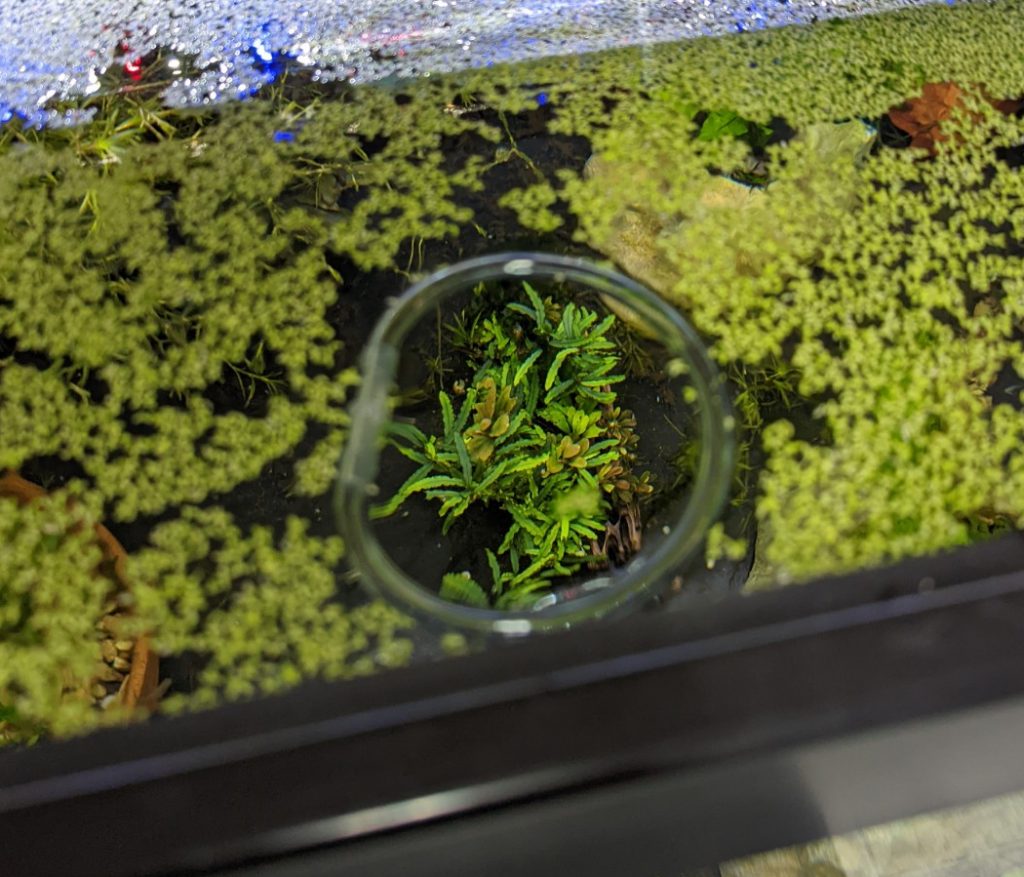
Floating plants offer a host of benefits for your fish tank, but they can also make feeding your fish a bit difficult. You don't want to dump fish food on top of a raft of floating plants. If the image above looks familiar, DIY floating fish feeder rings are a cheap solution that will help.

What are fish feeder rings?

Fish feeder rings, or floating feeding rings, are a simple device that sits on the surface of your aquarium and acts as a barrier to keep floating plants out of an area. This barrier creates a nice "window" into your tank that can be used for feeding. Floating feeder rings can be a variety of shapes and sizes, some have suction cups to hold them in one spot, and some can be combined with a feeding cone for live or frozen foods. There are a lot of cool feeding rings for sale that you can buy, but if you want to make your own, this DIY design uses components you may already have in your fish room!

DIY Floating Fish Feeder Ring
Floating Feeder Rings
Floating feeder Ring

How to make your own DIY floating fish feeder rings

All you need to make these floating fish feeding rings yourself is a length of aquarium airline tubing and a straight airline tubing connector. I always keep some scrap lengths of airline tubing around for projects like this. You only need about 6 inches of tubing for a small ring. The great thing about DIY feeder rings is that you can make them any size you want, and the only tool you need is a pair of scissors!

Aquarium Airline Parts

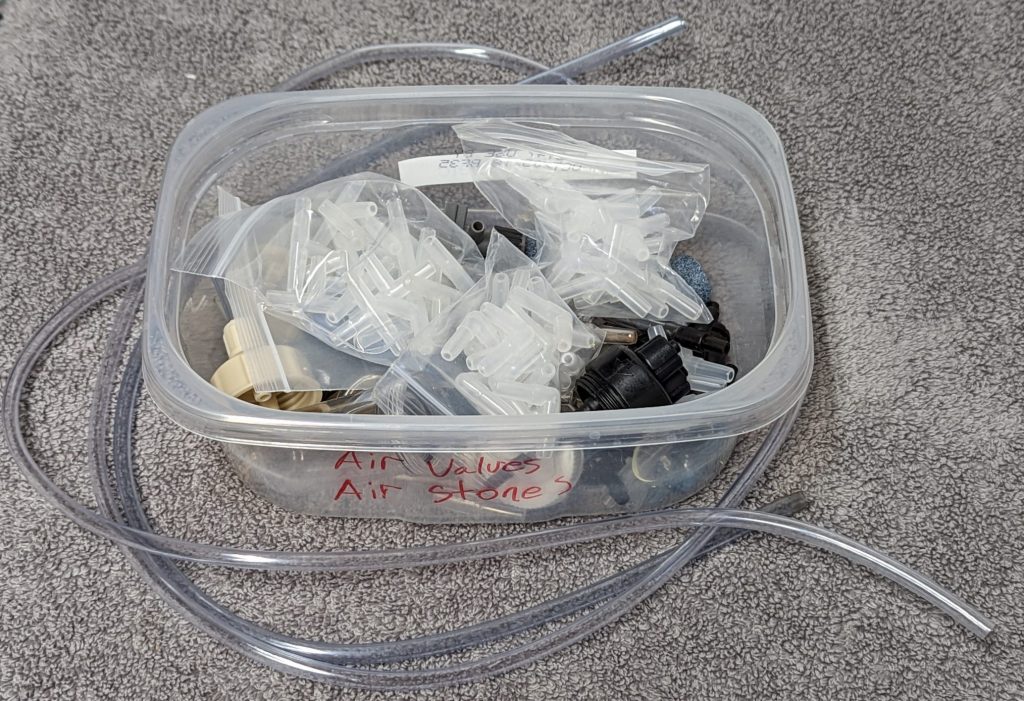
So first, dig out your old airline tubing and your airline connectors. I have a container full of fittings, elbows, connectors, and valves in my fish room. You never know when you might need parts for a project like this.

Straight Airline Connector

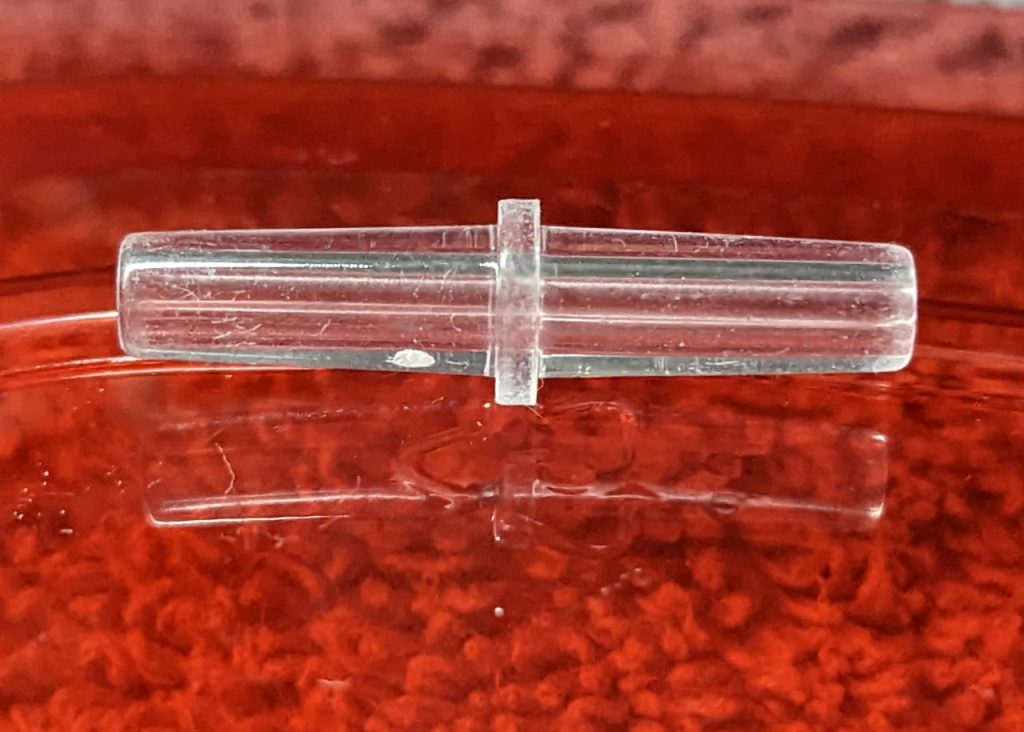
Once you've got a fitting, cut your piece of tubing to the size you want. Then connect the two ends together with the straight connector. That's it!

DIY Floating Ring
DIY Floating Ring

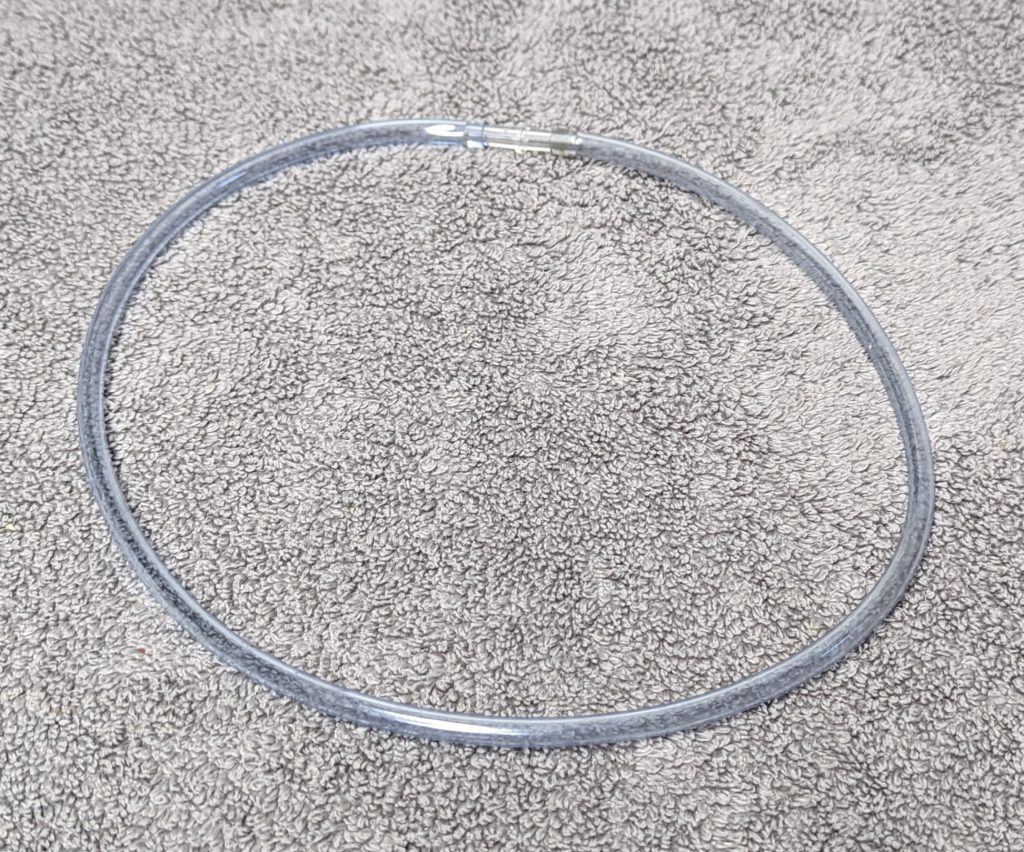
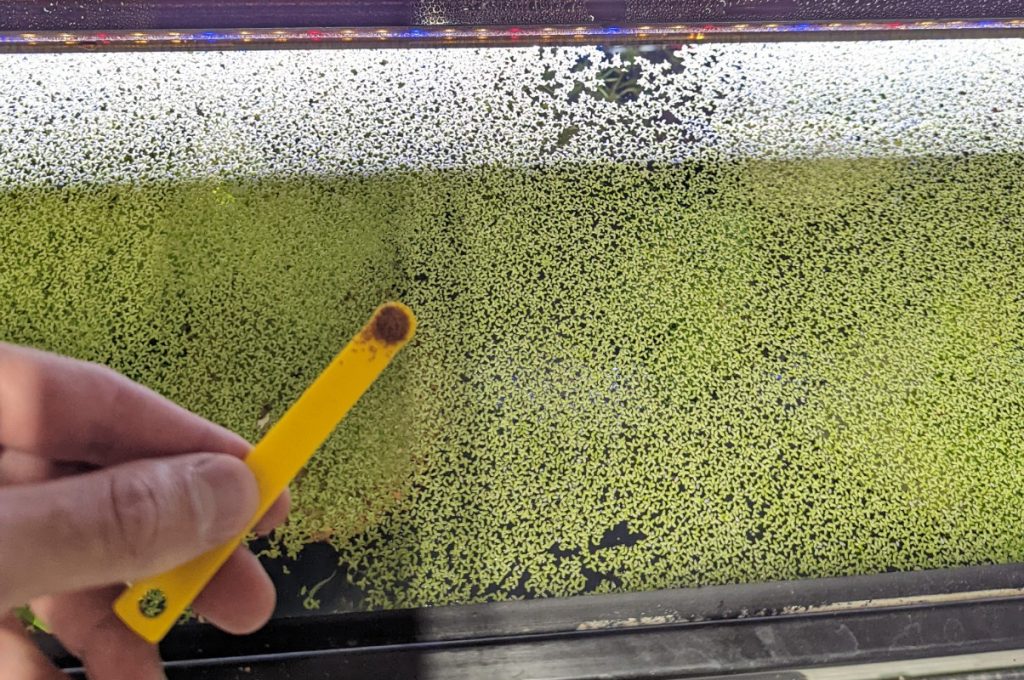
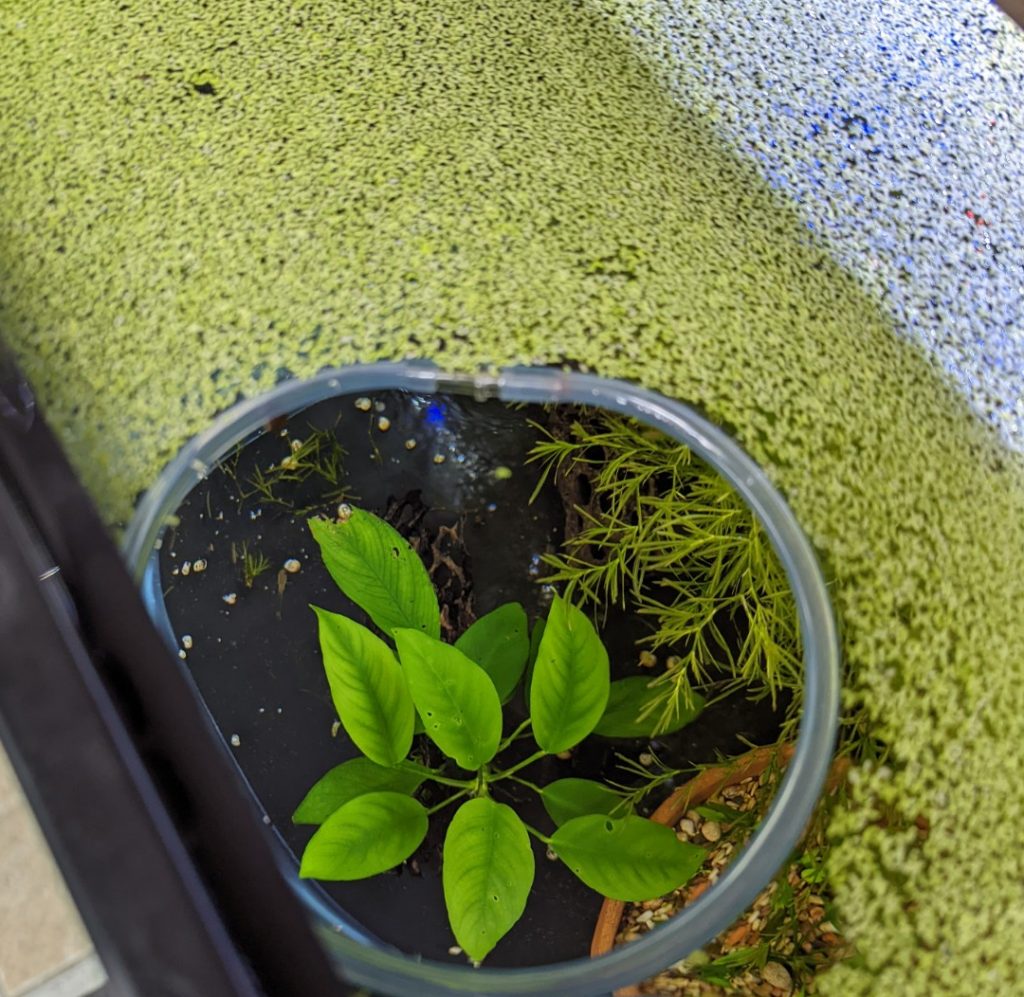
Once you have a ring, place it in your aquarium and use a net to gently remove any floating plants from the interior. The ring will stay on the surface and hold back your floating plants so you always have a clear area for feeding your fish!

A window into the tank

Interested in adding plants to your tank that won't get in the way or take over? Checkout my post on Adding Potted Plants to Your Aquarium

3

I built this DIY aquarium stand for a 100 gallon aquarium. This was a really simple build that just used 2x4s and a sheet of plywood.
100 Gallon Tank on DIY Stand

I built this DIY aquarium stand for a 100 gallon aquarium I bought used and resealed. (You can read my post about how I resealed this aquarium here.) This was a really simple build that just used 2x4s and a sheet of plywood. I'm not much of a carpenter, so I didn't use a router or employ any fancy joinery. My main focus is always the fish and my ability to service the aquarium, so this stand is built with those things in mind.

Tools and Materials for this DIY Aquarium Stand

Tools:

  • Power drill
  • Measuring tape
  • Table saw
  • Miter saw
  • Sand paper
  • Level

Materials:

  • 1 - 2 8ft 2x4s
  • 1 - 4ft x 8ft sheet of 1/2 inch plywood
  • 2 - wood knobs
  • 1 - box of 2.5 inch screws
  • 2 - cans of black spray paint
  • 6 - magnetic cabinet catches

Building the Aquarium Stand

Step 1: Cut the 2x4s

First I cut the 2x4s to make all of the pieces for the frame of the stand. This design uses two rectangles just slightly larger than the dimensions of the aquarium. My aquarium is 48" long x 24" wide, so the frame is about 49" x 25". One of these rectangles is the base of the stand and the other is the surface the tank sits on.

Cut 2x4 Pieces
Cut 2x4 Pieces

Four 32" vertical "guide" pieces determine the height of the stand. Eight 25" upright supports hold the weight of the aquarium. There are two of these vertical supports on each corner. This is important because 100 gallons of water weighs 800 lbs. Add 100 lbs for the aquarium itself, plus 100 lbs of substrate and rocks, the full weight is around 1,000 pounds. Screws alone would not hold that much weight, so vertical 2x4s are needed to support it.

Not pictured above are the four horizontal brace pieces that go across the width of the stand front-to-back. These are the same ~23.5" length as the short ends of the frame. The assembled stand is shown below, which should give you a good idea of how everything fits together.

Step 2: Assemble the frame

Fully Assembled Stand Frame

The frame is screwed together with 2.5" construction screws. I pre-drilled all of the holes to avoid splitting the wood. There are two screws at each joint. This should be done using a level on a flat surface so the stand ends up level. Wood glue can be added for extra strength, but I didn't use it on this project.

Screws
Screws

Step 3: Wrap the stand

Assembled Stand
Assembled Stand

I cut down one 4x8 sheet of plywood on a table saw to wrap three sides of the stand. I decided to leave the back open since it sits against a wall. The side panels are screwed into the frame. The front panel is secured by magnetic cabinet catches, so it pops off for maintenance.

Magnetic Cabinet Catch

I added two wooden knobs to the front panel to make it easier to remove. This stand could be built using normal cabinet doors and hinges. But I wanted to be able to pull the whole sump out easily for maintenance. Consider your filtration and maintenance needs when designing and building an aquarium stand.

Step 4: Sand and paint

I sanded down and spray painted the stand after assembling it. I used black spray paint to match the trim of the aquarium.

Painted Stand
Painted Stand

Completed DIY Aquarium Stand

After painting, I added a wooden bottom inside the stand so the sump doesn't sit on the floor. This is an optional step. I probably wouldn't have added it if I were using a canister filter. Then I hung the power strip on the left and put a small storage shelf on the right side. Below you can see what the stand looks like with the front panel removed.

Completed Stand
Completed Stand

After a couple weeks I added an LED strip light to the inside of the stand. The lights also wrap up the back side of the aquarium. This lets me see inside the sump when I clean the tank. It also adds a cool back lighting when turned on.

LED Lighting Under Stand
RGB LED Backlight
RGB LED Backlight

Altogether this DIY aquarium stand cost me less than $200 to build. I think custom built wooden stands are the way to go for larger aquariums. You can make a custom stand for your aquarium that will cost less and hold up better than most stands you can buy.

1

How to make your own DIY hinged glass lids for your aquarium.
DIY Hinged Aquarium Lids

I've previously written about how to make some very inexpensive DIY glass aquarium lids. But that design uses a single piece of glass that needs to be lifted off the aquarium for maintenance. For larger aquariums, a hinged design with thicker, tempered glass is more convenient and reliable.

You can buy hinged glass aquarium lids for many standard sized aquariums, but they can be harder to find for some larger tanks. Additionally, the lids available commercially almost all have a dark plastic hinge running across the whole lid. This thick plastic strip blocks light and can create shadows in your aquarium. For my 100 gallon aquarium, which is not a standard dimension because it used to be a reef tank, I made my own hinged glass lids.

Materials Needed to Build Your Own Hinged Glass Aquarium Lids

For this project all you need is:

How to Make Hinged Aquarium Lids

I used a sheet of cardboard as a working surface to glue my lids together. The hardest part about assembling these DIY glass aquarium lids will be aligning the hinges so that they function properly. I recommend using a business card or shim to keep the two pieces of glass evenly spaced while gluing the hinges in place. A small gap should be sufficient.

Since my lids are almost 2 feet wide, I used two 6 inch hinges on each lid. For smaller lids you could use smaller hinges. This is one of the benefits of these DIY glass hinged lids, you can customize their design to fit your setup.

Gluing Hinges in Place

Let the glue cure for a few hours before you attempt to move the lids or bend the hinges. The good news is if you screw up during this process, any stray glue can be removed from the glass with a razor blade scraper once it dries. I used some cheap wooden knobs that I had leftover from other projects as the handles on these lids. A glob of super glue is all you need to attach these to the glass.

Knob Handle
Knob Handle

Once the glue cures your lids are ready to go!

Finished DIY Hinged Glass Lids

Check out some of my other DIY Aquarium Lid designs: